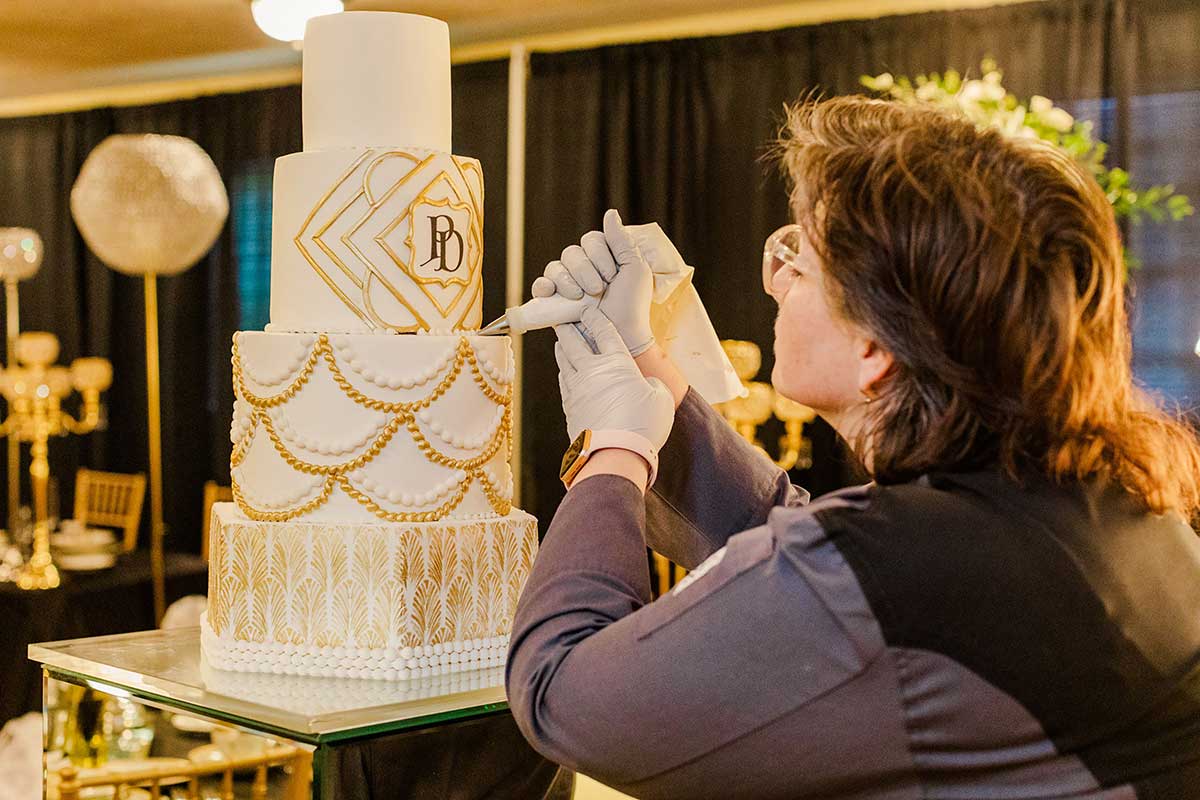
 Nothing sends chills down a cake artist’s spine more than knowing the cake you are making needs to survive a long drive in the car before it reaches its destination! The stress of knowing your cake must look as good when it makes its debut at the party as it did when it left your studio is a fear we all share. However, it is a fear that must be faced head-on with an arsenal of tips and tricks to help your cake survive the long haul!
Building A Strong Foundation
Just like a building is only as strong as its foundation, your cake must be built from the ground up with stable ingredients. If it is going to make it through any kind of traffic, you must consider the stability of each element that goes into building your cake. Starting with the cake itself, it really should be baked at least a day in advance and be completely cooled before adding any fillings or syrups. Warm, fresh cake is too soft and malleable to withstand the movement that happens during travel. I personally freeze my cake layers, and just before they are fully defrosted, I fill and crumb ice each tier. This ensures that the interior temperature of my cakes never reaches 70°F (21°C).
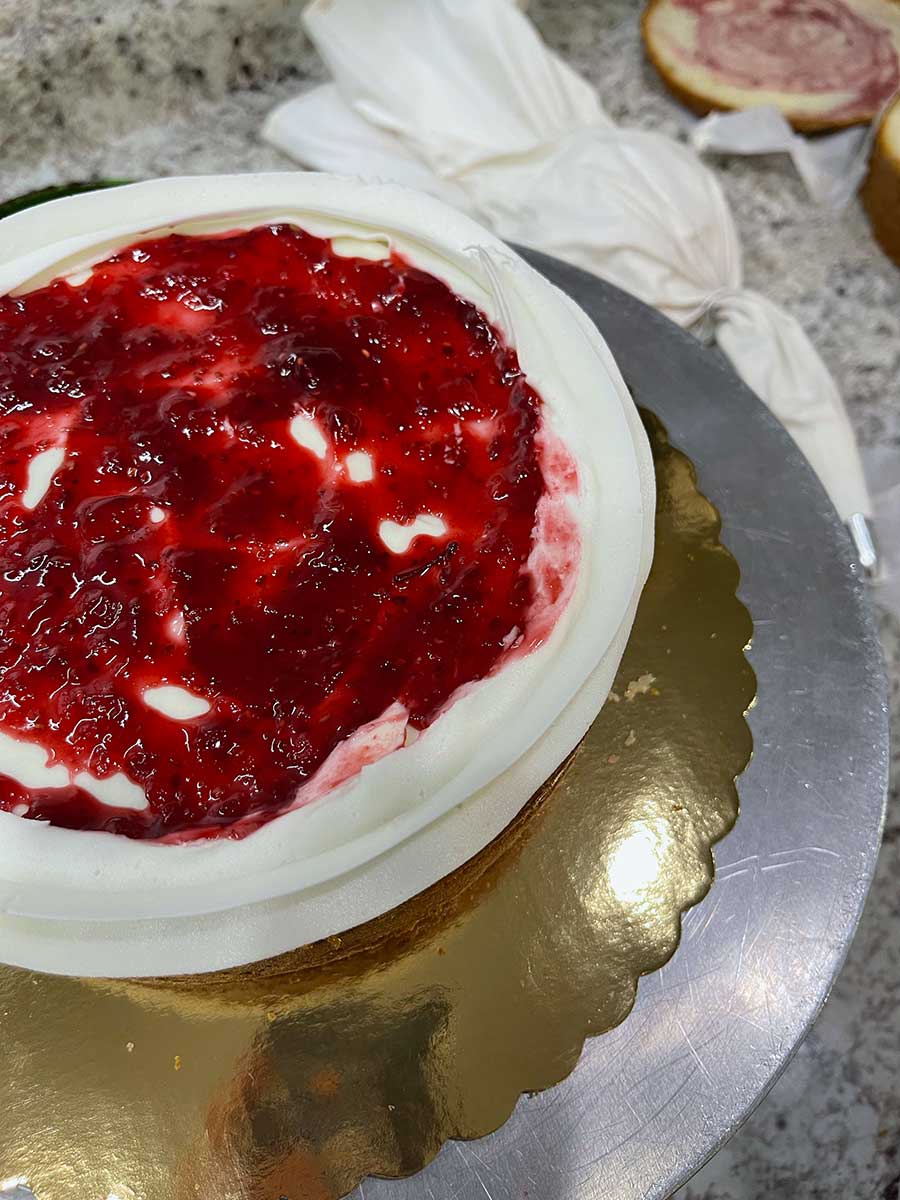
Second, to keep the structure of your cake completely stable, you must consider what type of filling you are going to use. You want to choose a filling that is solid when you take it out of the refrigerator. For example, any buttercream-base filling is ideal. Butter hardens in the fridge and will be less likely to cause any internal movement within the tiers of cake while it remains chilled. However, it is very common to use a fruit filling in between the layers of your cakes. This is completely acceptable, as long you use a very thin layer and then use an icing dam around the edge of each layer of cake to keep the preserve from “leaking” out or allowing too much movement.
Nothing sends chills down a cake artist’s spine more than knowing the cake you are making needs to survive a long drive in the car before it reaches its destination! The stress of knowing your cake must look as good when it makes its debut at the party as it did when it left your studio is a fear we all share. However, it is a fear that must be faced head-on with an arsenal of tips and tricks to help your cake survive the long haul!
Building A Strong Foundation
Just like a building is only as strong as its foundation, your cake must be built from the ground up with stable ingredients. If it is going to make it through any kind of traffic, you must consider the stability of each element that goes into building your cake. Starting with the cake itself, it really should be baked at least a day in advance and be completely cooled before adding any fillings or syrups. Warm, fresh cake is too soft and malleable to withstand the movement that happens during travel. I personally freeze my cake layers, and just before they are fully defrosted, I fill and crumb ice each tier. This ensures that the interior temperature of my cakes never reaches 70°F (21°C).
Second, to keep the structure of your cake completely stable, you must consider what type of filling you are going to use. You want to choose a filling that is solid when you take it out of the refrigerator. For example, any buttercream-base filling is ideal. Butter hardens in the fridge and will be less likely to cause any internal movement within the tiers of cake while it remains chilled. However, it is very common to use a fruit filling in between the layers of your cakes. This is completely acceptable, as long you use a very thin layer and then use an icing dam around the edge of each layer of cake to keep the preserve from “leaking” out or allowing too much movement.
 Third, to keep your cake structurally sound, you must keep your cake chilled the during the entire decorating process. This is a challenge, because you must take your cake out of the refrigerator to work on it! So, how do you deal with this? Consider what elements can be done ahead of time. While your cake is in the cooler, you can work on any fondant pieces, or maybe mix your icings colors all at once, so that they are ready to apply all at one time. Once you do have your cake out to decorate, keep a close eye on it and watch for signs of warming. These signs can be drooping edges or an overly shiny appearance. To avoid this, put your cake back in the fridge from time to time so that it has a chance to cool back down. Overall, it is very important that the interior of your cake never fully warms up to room temperature or your cake will shift and cause problems during transit.
Finally, depending on the design of your cake, I would refrain from putting any large 3D elements on your cake before travel. This includes items such as fondant figures or large or heavy sugar flowers. These elements are just too heavy to withstand the constant movement of a car ride to survive on the cake itself. I had to learn this fact the hard way. I almost cried seeing my fondant figure fall to pieces leaving a big hole in my cake at the end of a road trip! Just be patient and wait to add these items to the cake. I suggest just putting these elements aside in a travel-safe box with some padding so they can survive the trip as well. Then, just apply your final touches at the venue when your masterpiece is safe and level!
Adding Support
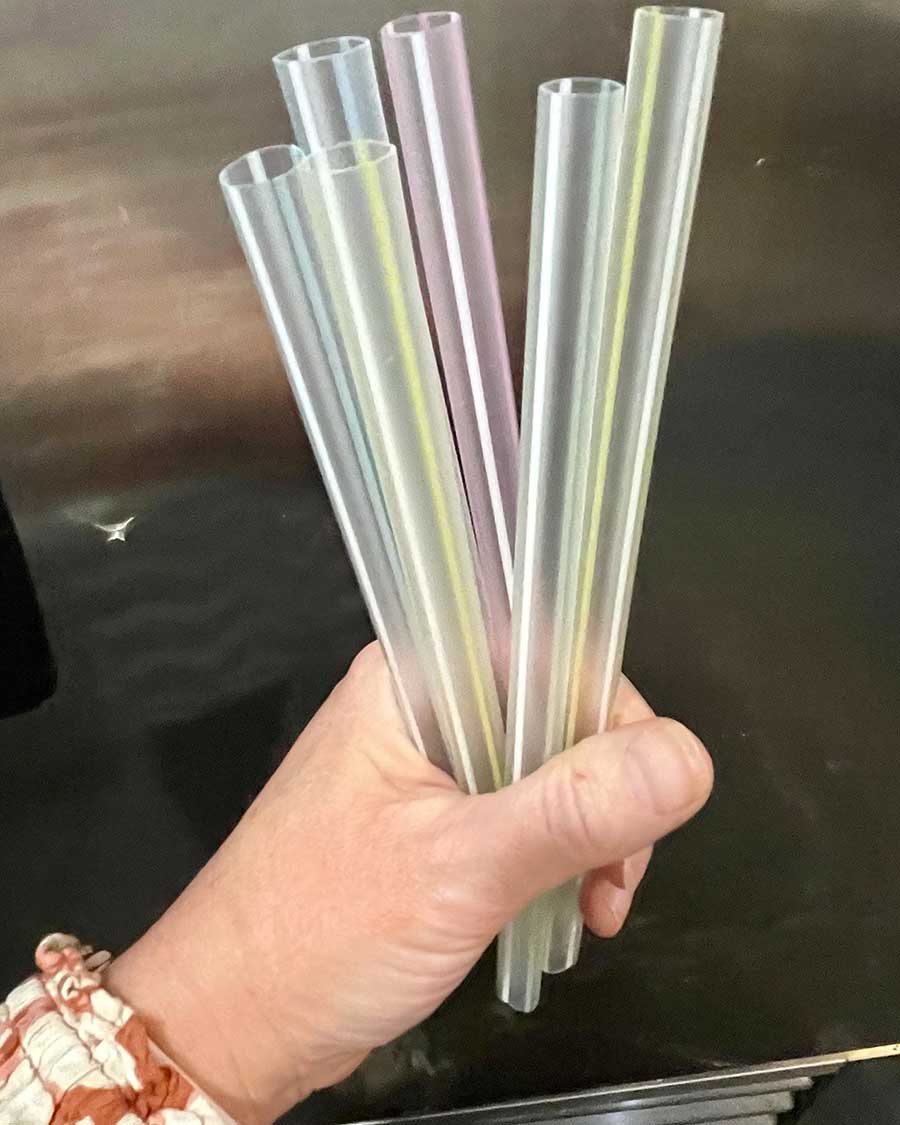
Now that your cake is built from the ground up to be firm and stable, it is important to add the proper support to withstand the forces you will encounter during travel. First, you must consider the vertical pressures. If you are building a multi-tiered cake, each tier must have the proper amount of dowel rods to support any weight that is added to the top. I find boba straws to be ideal. These straws can be easily cut to the right height and provide amazing support to withstand any vertical load placed on it. When constructing a cake, I usually use about the same number of straws as the diameter of the cake. For example, if it is a 7” cake, going on top of a 9” round, I use 7–8 boba straws as support.
Third, to keep your cake structurally sound, you must keep your cake chilled the during the entire decorating process. This is a challenge, because you must take your cake out of the refrigerator to work on it! So, how do you deal with this? Consider what elements can be done ahead of time. While your cake is in the cooler, you can work on any fondant pieces, or maybe mix your icings colors all at once, so that they are ready to apply all at one time. Once you do have your cake out to decorate, keep a close eye on it and watch for signs of warming. These signs can be drooping edges or an overly shiny appearance. To avoid this, put your cake back in the fridge from time to time so that it has a chance to cool back down. Overall, it is very important that the interior of your cake never fully warms up to room temperature or your cake will shift and cause problems during transit.
Finally, depending on the design of your cake, I would refrain from putting any large 3D elements on your cake before travel. This includes items such as fondant figures or large or heavy sugar flowers. These elements are just too heavy to withstand the constant movement of a car ride to survive on the cake itself. I had to learn this fact the hard way. I almost cried seeing my fondant figure fall to pieces leaving a big hole in my cake at the end of a road trip! Just be patient and wait to add these items to the cake. I suggest just putting these elements aside in a travel-safe box with some padding so they can survive the trip as well. Then, just apply your final touches at the venue when your masterpiece is safe and level!
Adding Support
Now that your cake is built from the ground up to be firm and stable, it is important to add the proper support to withstand the forces you will encounter during travel. First, you must consider the vertical pressures. If you are building a multi-tiered cake, each tier must have the proper amount of dowel rods to support any weight that is added to the top. I find boba straws to be ideal. These straws can be easily cut to the right height and provide amazing support to withstand any vertical load placed on it. When constructing a cake, I usually use about the same number of straws as the diameter of the cake. For example, if it is a 7” cake, going on top of a 9” round, I use 7–8 boba straws as support.
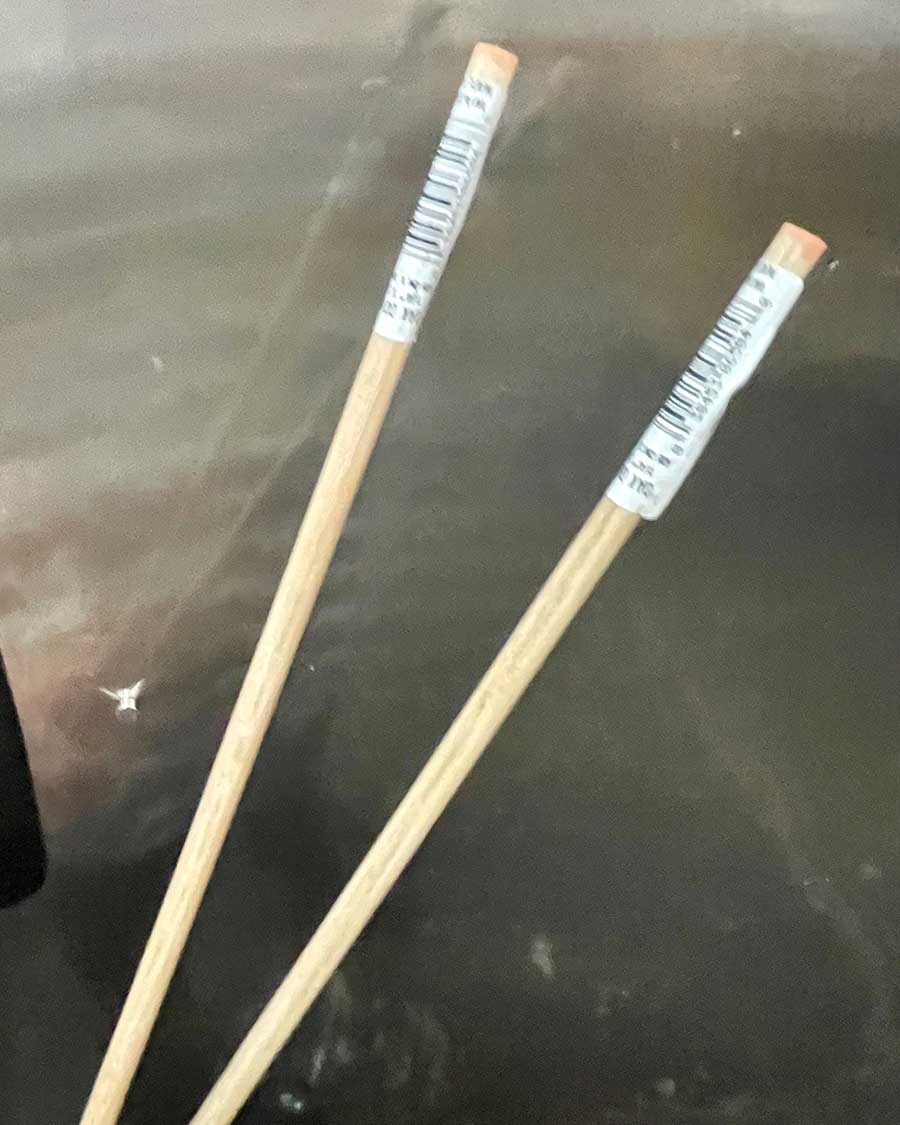
 Second, if you are planning to travel with a multi-tiered cake, it must be skewered all the way through vertically and keep the cake from sliding off the board itself. The easiest way to do this is to purchase a 1/4” wooden dowel rod at any hardware or crafting store. This rod needs to be 2” shorter than the overall height of the cake. Take the rod and roughly cut it to the approximate height of your cake and then file the end to a nice sharp tip. Then push the rod all the way through the cake starting from the top tier. This takes a bit of careful effort. The rod should be sharp enough to pierce through each cake board at the base of each tier and sink into the bottom cake board itself. The rod gets pushed into the cake and disappears just below the top of the cake with just a dab of buttercream or fondant to hide the hole you made pushing it in.
 This is just one way to achieve the vertical structure support between the tiers. I’ve seen other accomplished bakers start with a dowel rod attached to the bottom cake board itself, and then they thread each layer of cake onto the board as they build the cake. You can also purchase a product called the “Cake Safe.” This is a box that your cake travels in that includes a vertical element that pierces through the cake itself while it travels in the box. A Cake Safe is wonderful product and could be a worthwhile investment if you plan to do a lot of traveling with your cakes, but it is a significant financial investment.
Packing Your Cake
Now that your cake is structurally sound and vertically and horizontally secure, it’s time to pack it into your car! Don’t forget to consider the temperature inside your vehicle. Make sure you start up your car and get the air conditioning running so that the interior of the car is at or below 68°F (20°C) before you load your cake in.
As your car’s interior is cooling, gather materials to secure your cake for transit. Try to find a tight-fitting box. Ideally, if your cake board is 12” in diameter, it would be best to find a box that is 12” by 12” by the height of the cake. This will prevent your cake from slipping around. If that is not possible, and the box is larger than your cake, you can place a piece of non-slip shelf liner to place under the cake board to prevent it from possibly sliding inside the box.
Now, that your cake is in a box, I strongly recommend placing your cake on a LEVEL surface in your vehicle. This is most likely in the back of your car, or on the floorboards. Car seats may look level, but most have a slight angle that will in turn cause your cake to lean. This will add undue stress on your product. Once you find a nice level surface, before you put your cake down, place a large piece of the non-slip shelf liner down under the box. This will grip the cake box and keep it from sliding around inside the car as you drive down the street.
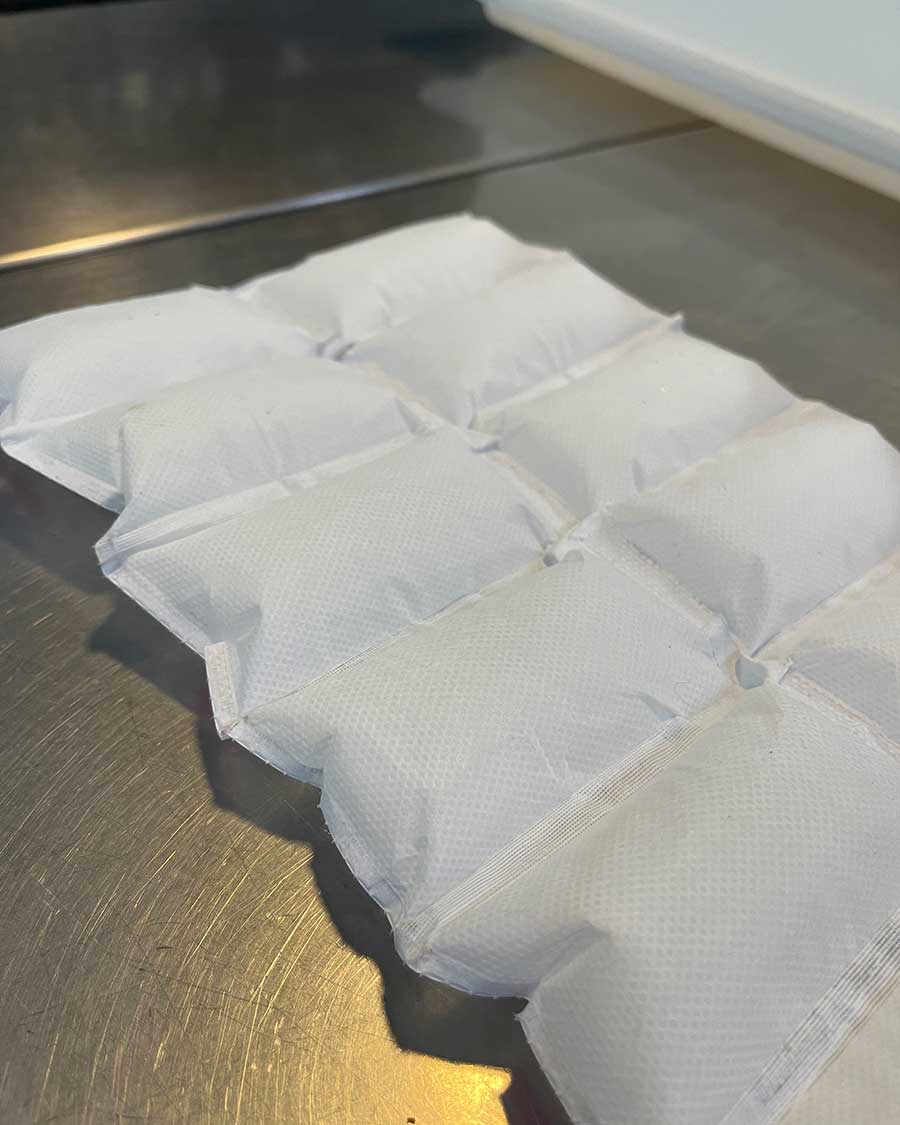
If there is a possibility that you will travel with your cake in the car for over an hour, I strongly recommend you take along some ice packs. There are several ways you can do this—ideally, the best thing to do is to purchase some disposable freezer mats. Most mats can be cut to the dimension of the cake box and placed in the box and under the cake itself, so that the cake is sitting on a surface made of ice. If that is not possible, you can place small ice packs next to the cake box once the cake is packed in the car. This adds some insurance to keeping your cake extra chilly in case you get stuck in traffic. Just keep in mind: the colder your cake stays through your trip, the more likely your cake will stay intact! My final suggestion is to drape a throw blanket over the cake box for extra insulation.
This is just one way to achieve the vertical structure support between the tiers. I’ve seen other accomplished bakers start with a dowel rod attached to the bottom cake board itself, and then they thread each layer of cake onto the board as they build the cake. You can also purchase a product called the “Cake Safe.” This is a box that your cake travels in that includes a vertical element that pierces through the cake itself while it travels in the box. A Cake Safe is wonderful product and could be a worthwhile investment if you plan to do a lot of traveling with your cakes, but it is a significant financial investment.
Packing Your Cake
Now that your cake is structurally sound and vertically and horizontally secure, it’s time to pack it into your car! Don’t forget to consider the temperature inside your vehicle. Make sure you start up your car and get the air conditioning running so that the interior of the car is at or below 68°F (20°C) before you load your cake in.
As your car’s interior is cooling, gather materials to secure your cake for transit. Try to find a tight-fitting box. Ideally, if your cake board is 12” in diameter, it would be best to find a box that is 12” by 12” by the height of the cake. This will prevent your cake from slipping around. If that is not possible, and the box is larger than your cake, you can place a piece of non-slip shelf liner to place under the cake board to prevent it from possibly sliding inside the box.
Now, that your cake is in a box, I strongly recommend placing your cake on a LEVEL surface in your vehicle. This is most likely in the back of your car, or on the floorboards. Car seats may look level, but most have a slight angle that will in turn cause your cake to lean. This will add undue stress on your product. Once you find a nice level surface, before you put your cake down, place a large piece of the non-slip shelf liner down under the box. This will grip the cake box and keep it from sliding around inside the car as you drive down the street.
If there is a possibility that you will travel with your cake in the car for over an hour, I strongly recommend you take along some ice packs. There are several ways you can do this—ideally, the best thing to do is to purchase some disposable freezer mats. Most mats can be cut to the dimension of the cake box and placed in the box and under the cake itself, so that the cake is sitting on a surface made of ice. If that is not possible, you can place small ice packs next to the cake box once the cake is packed in the car. This adds some insurance to keeping your cake extra chilly in case you get stuck in traffic. Just keep in mind: the colder your cake stays through your trip, the more likely your cake will stay intact! My final suggestion is to drape a throw blanket over the cake box for extra insulation.
 You Made It!
Finally, you’ve reached your destination! I would suggest finding a parking space as close possible to the door. Secondly, check out the room as well as the cake table to ensure you know where you are going and that all the elements are in place. I would also consider propping any doors open and alert the host that the cake is coming in. With this forewarning, most people will stand aside and not accidentally cross your path while you are handling a fragile cake.
You Made It!
Finally, you’ve reached your destination! I would suggest finding a parking space as close possible to the door. Secondly, check out the room as well as the cake table to ensure you know where you are going and that all the elements are in place. I would also consider propping any doors open and alert the host that the cake is coming in. With this forewarning, most people will stand aside and not accidentally cross your path while you are handling a fragile cake.
 My final tip would be to make sure you bring a repair kit with you. In this kit you should have a small amount of all the elements you used to decorate the cake. This would include extra icing, and tools you used to complete the look. In my kit I always keep scissors, toothpicks, wet wipes, and gloves. You never know what could happen while in transit and you want to be prepared for the worst!
Traveling with your cake is your final chance to make a great impression. Following these tips and tricks will put your mind at ease as you make your way. Although there’s no silver bullet for cake transportation, taking these words to heart will help you get your cake safely to your destination.
My final tip would be to make sure you bring a repair kit with you. In this kit you should have a small amount of all the elements you used to decorate the cake. This would include extra icing, and tools you used to complete the look. In my kit I always keep scissors, toothpicks, wet wipes, and gloves. You never know what could happen while in transit and you want to be prepared for the worst!
Traveling with your cake is your final chance to make a great impression. Following these tips and tricks will put your mind at ease as you make your way. Although there’s no silver bullet for cake transportation, taking these words to heart will help you get your cake safely to your destination.
I have been doing this over 30 years and follow every one of these suggestions to the letter. I wish I had something like this when I started years ago, thankfully I only had one time where I had to make a major repair because of sliding. That was nuts, would never wish that on anyone
Very good
Very good info