If you’re anything like me, you probably have a list of projects you really want to make. There never seems to be enough time in the day. One such project I’ve had on my list for a few years now was reverse spherification egg yolks.
Can I really make my runny egg dreams come true? I’ve been experimenting casually with molecular gastronomy for a long time now. Below is my first experiment with spherification. I was pretty excited about this “caviar” flavored with Orange Crush.

Spherification was fun but I found it challenging to get consistently shaped orbs, as the technique requires an oil bath and liquid injected into the bath via syringe. When I heard about spherification’s simpler sister, frozen reverse spherification, I knew I had to try it.
I got all my supplies and, well, life got in the way again. My project was shelved, but I always kept it on my to-do wish list. When I was approached to contribute to Creative Cake Design, I realized it was the perfect opportunity to try this project.
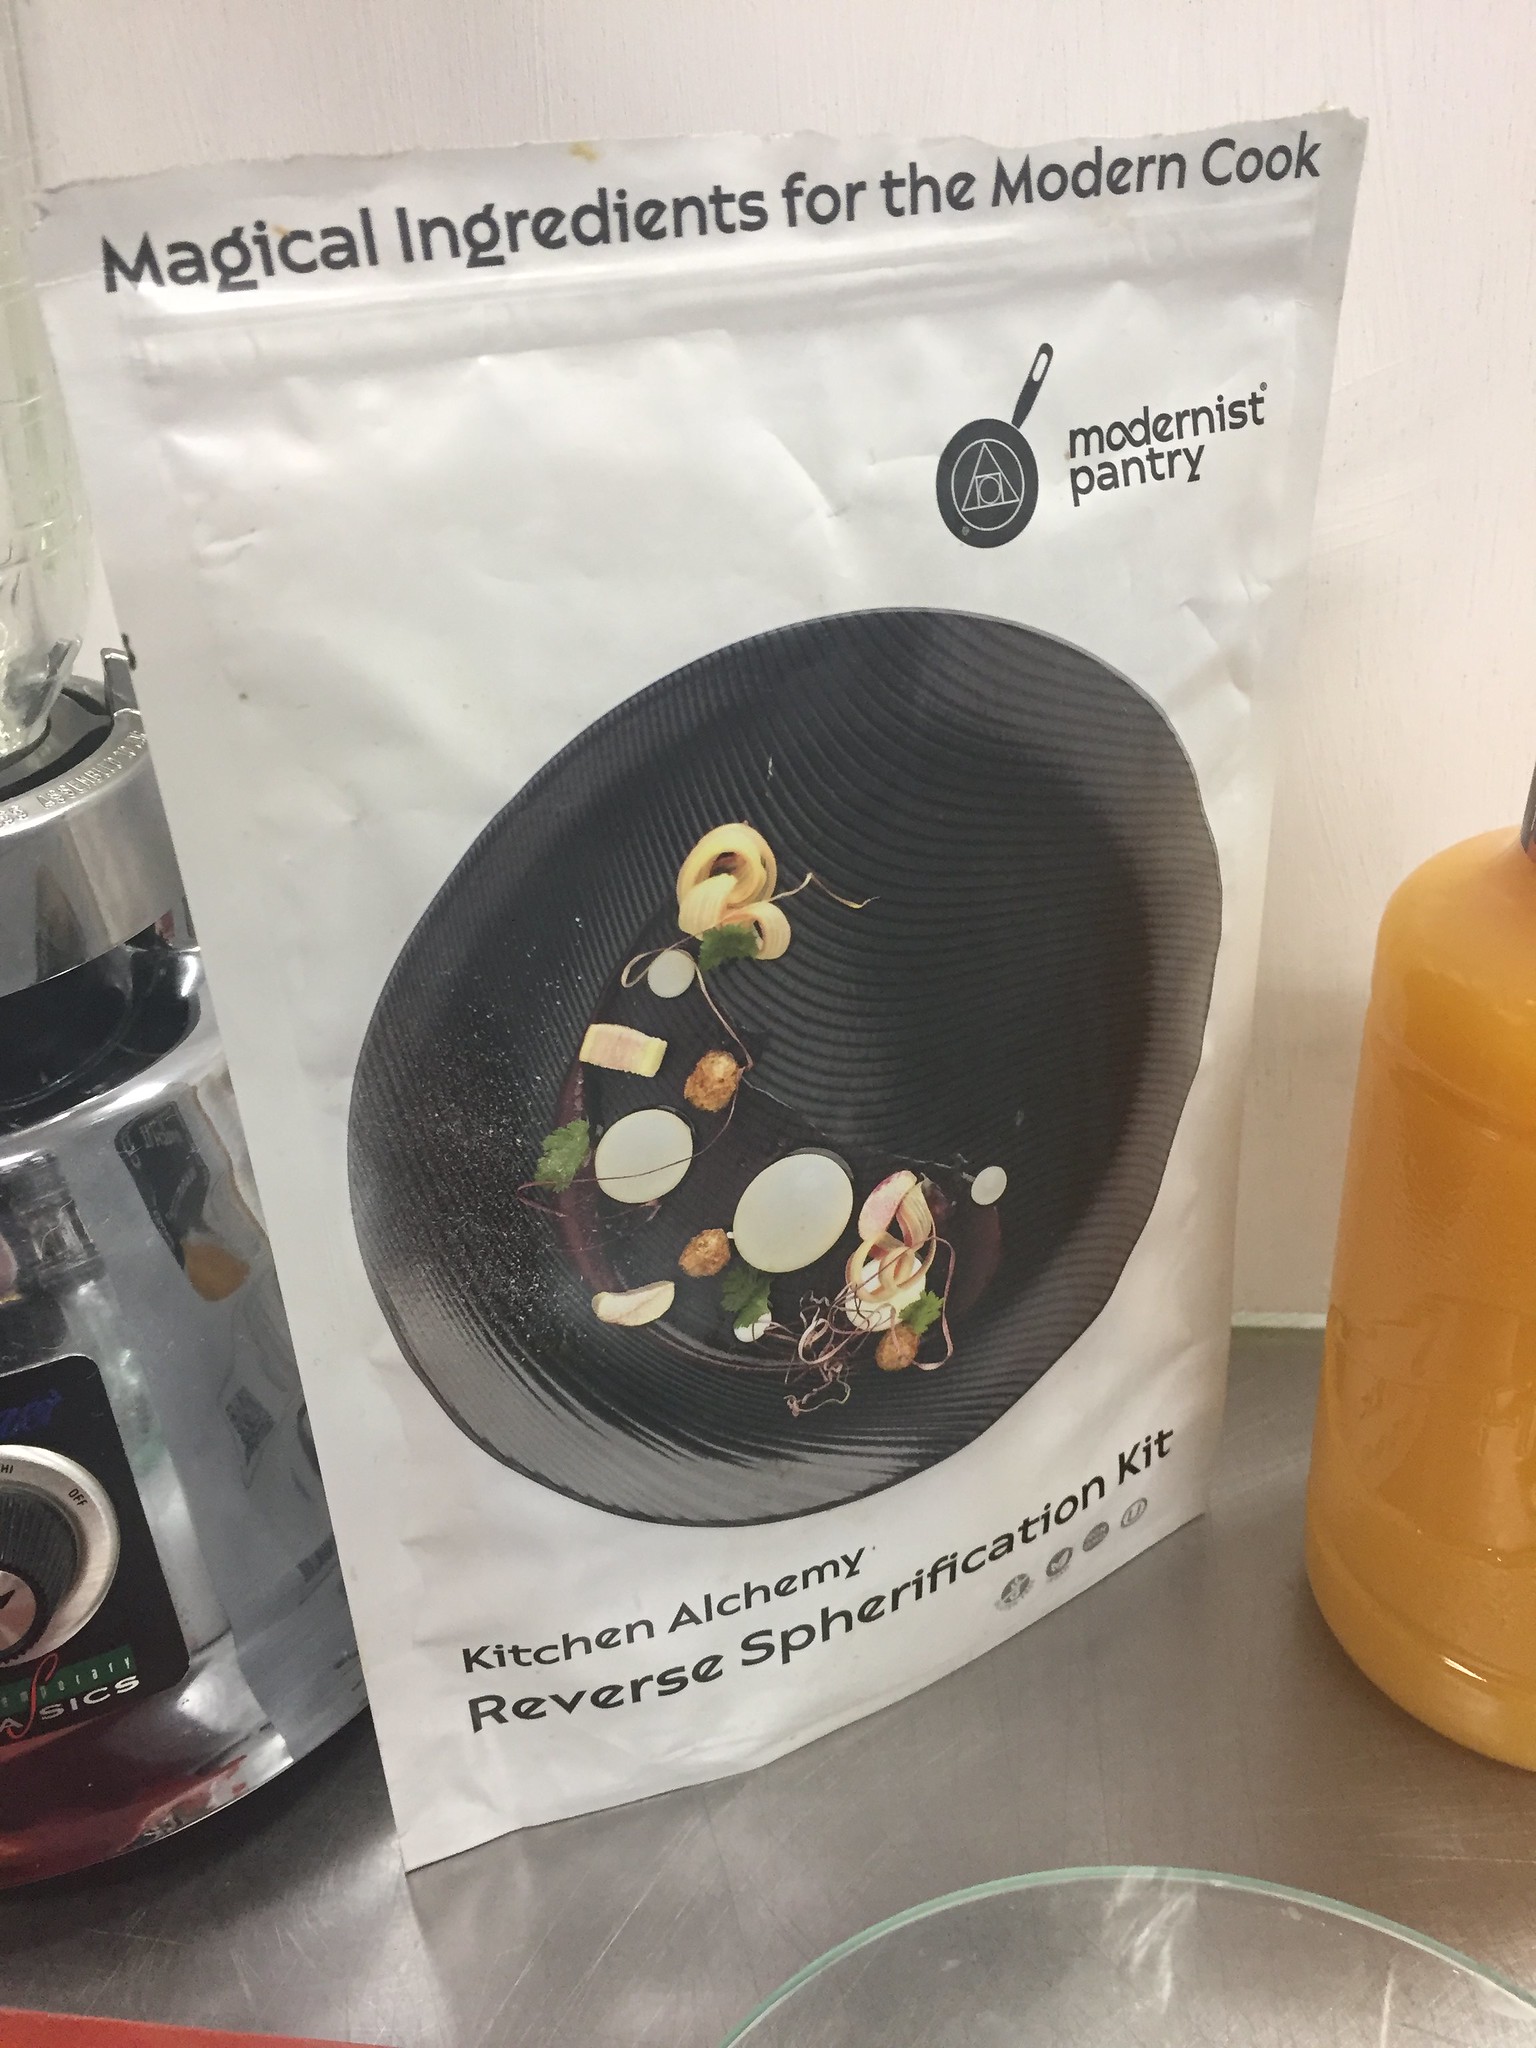
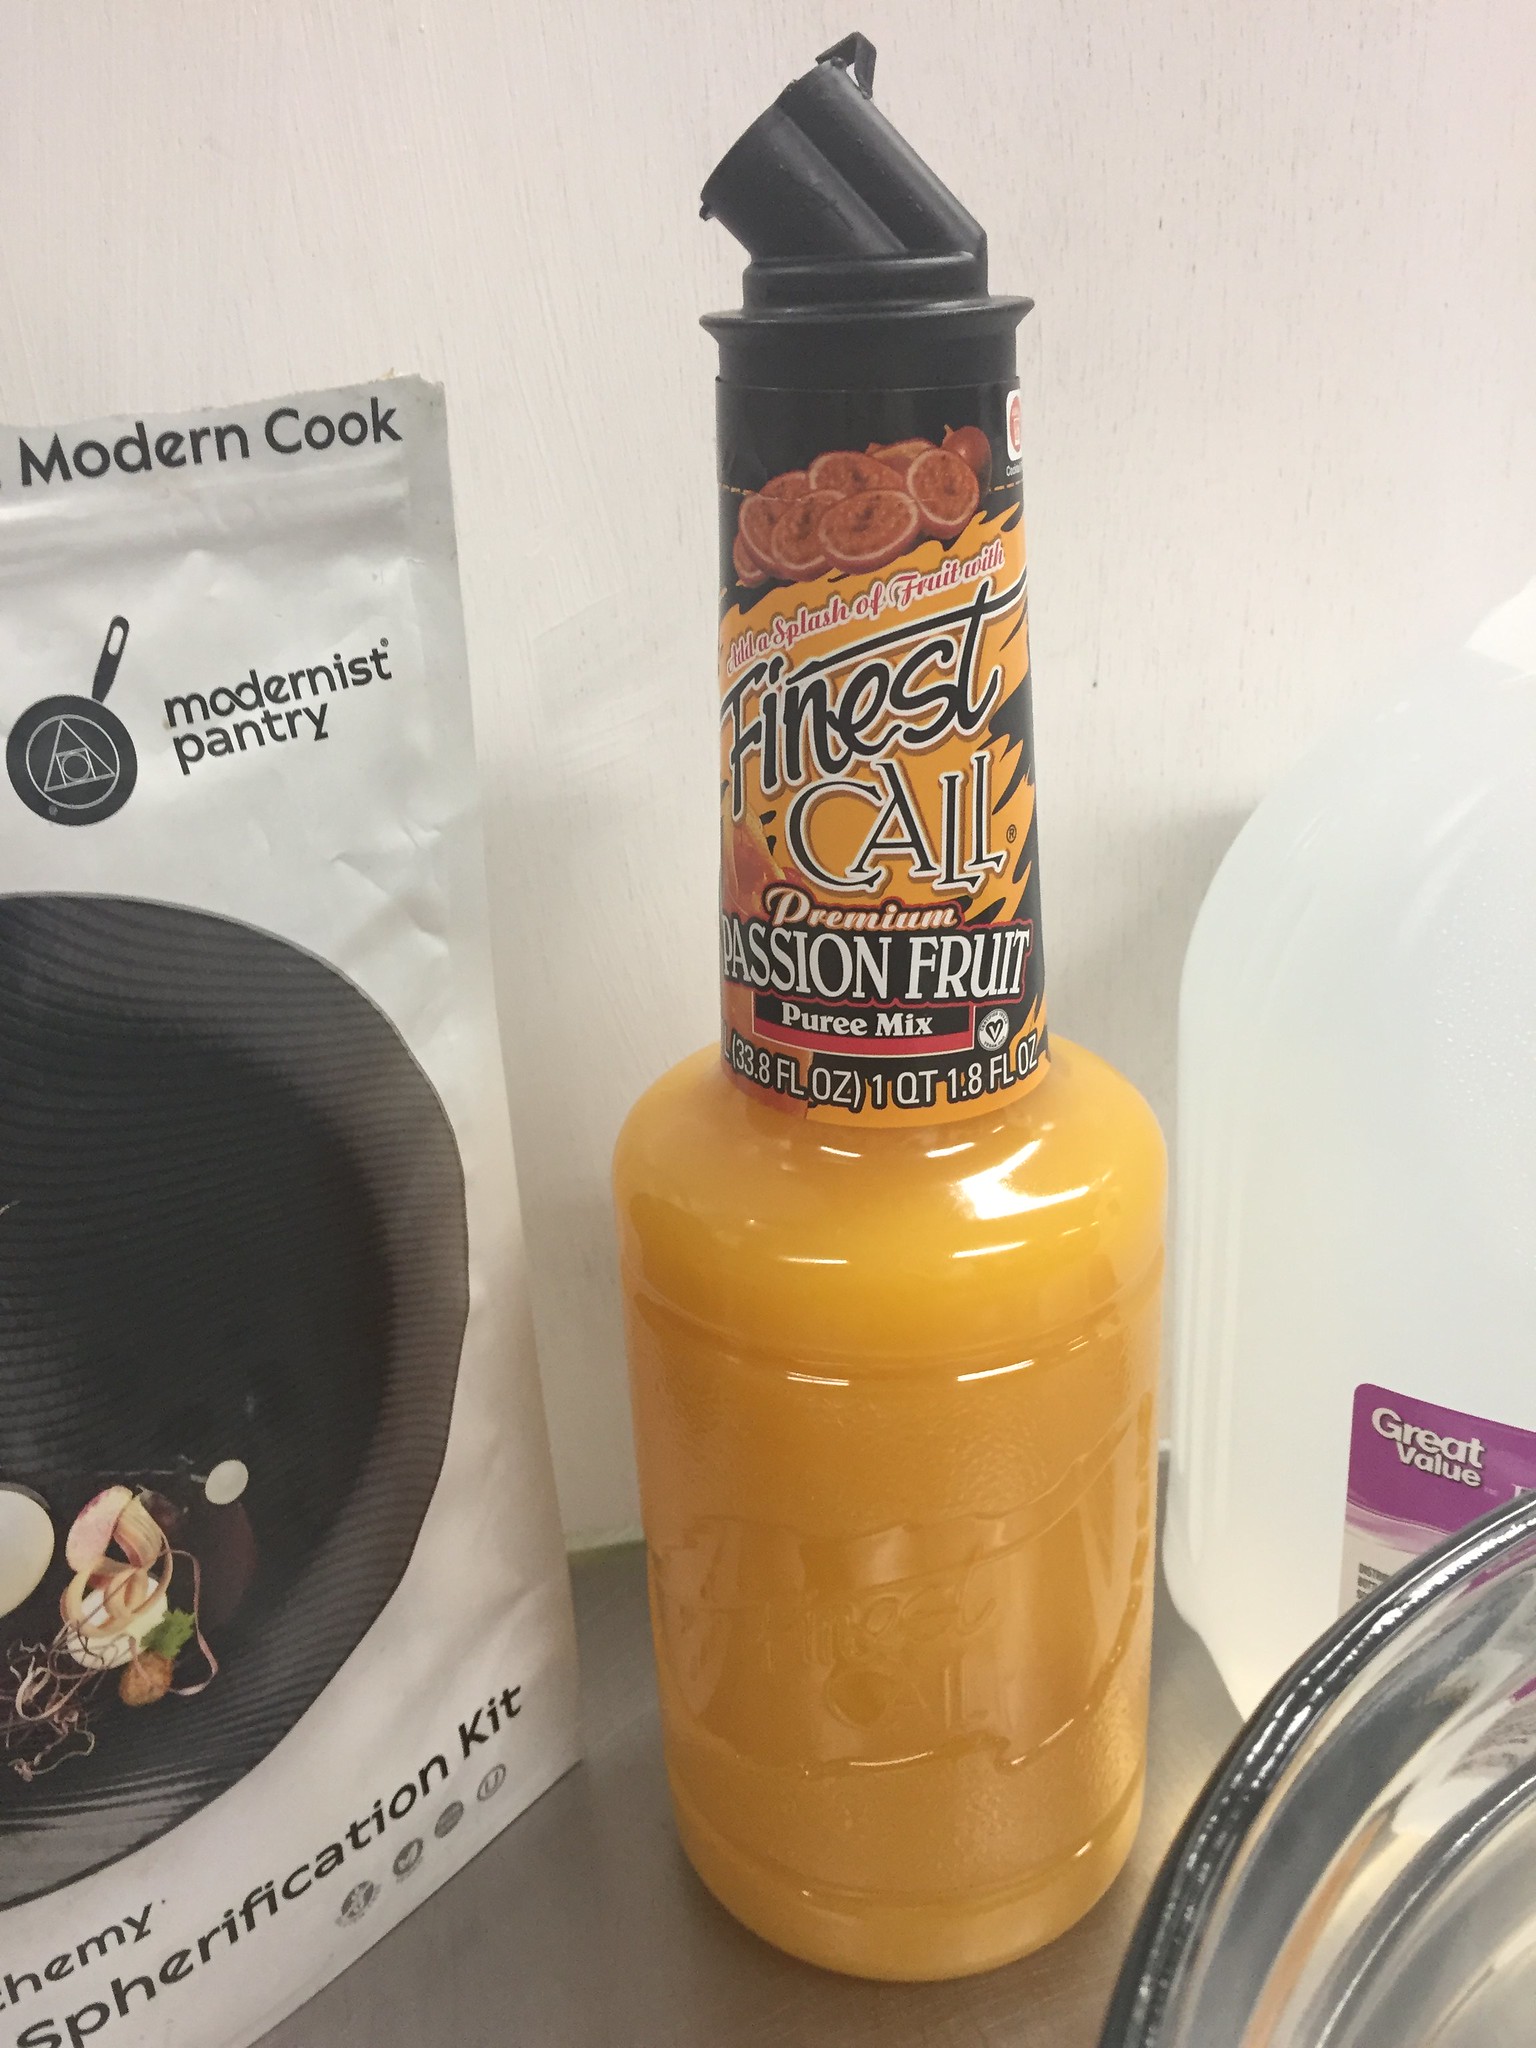
You’ll need just a few supplies: distilled water, molecular gastronomy ingredients (I like the kits from Modernist Pantry, but you can buy them individually on Amazon and other sites), and a juice of your choice. I searched for a long time to see what I liked best and stumbled upon passionfruit puree from Finest Call in the mixers section. I really thought the color seemed perfect for yolks and that it would be a tasty complement to my vanilla flavored “toast.”
Bonus: Passionfruit is an ingredient known to reduce anxiety. Excuse me while I pour myself a giant glassful.
The tools you’ll need are a scale, cup, blender (traditional or immersion will do), plastic wrap, a whisk, slotted spoon, and a hemisphere silicone mold. I think a 1.5” cavity size is most realistic.
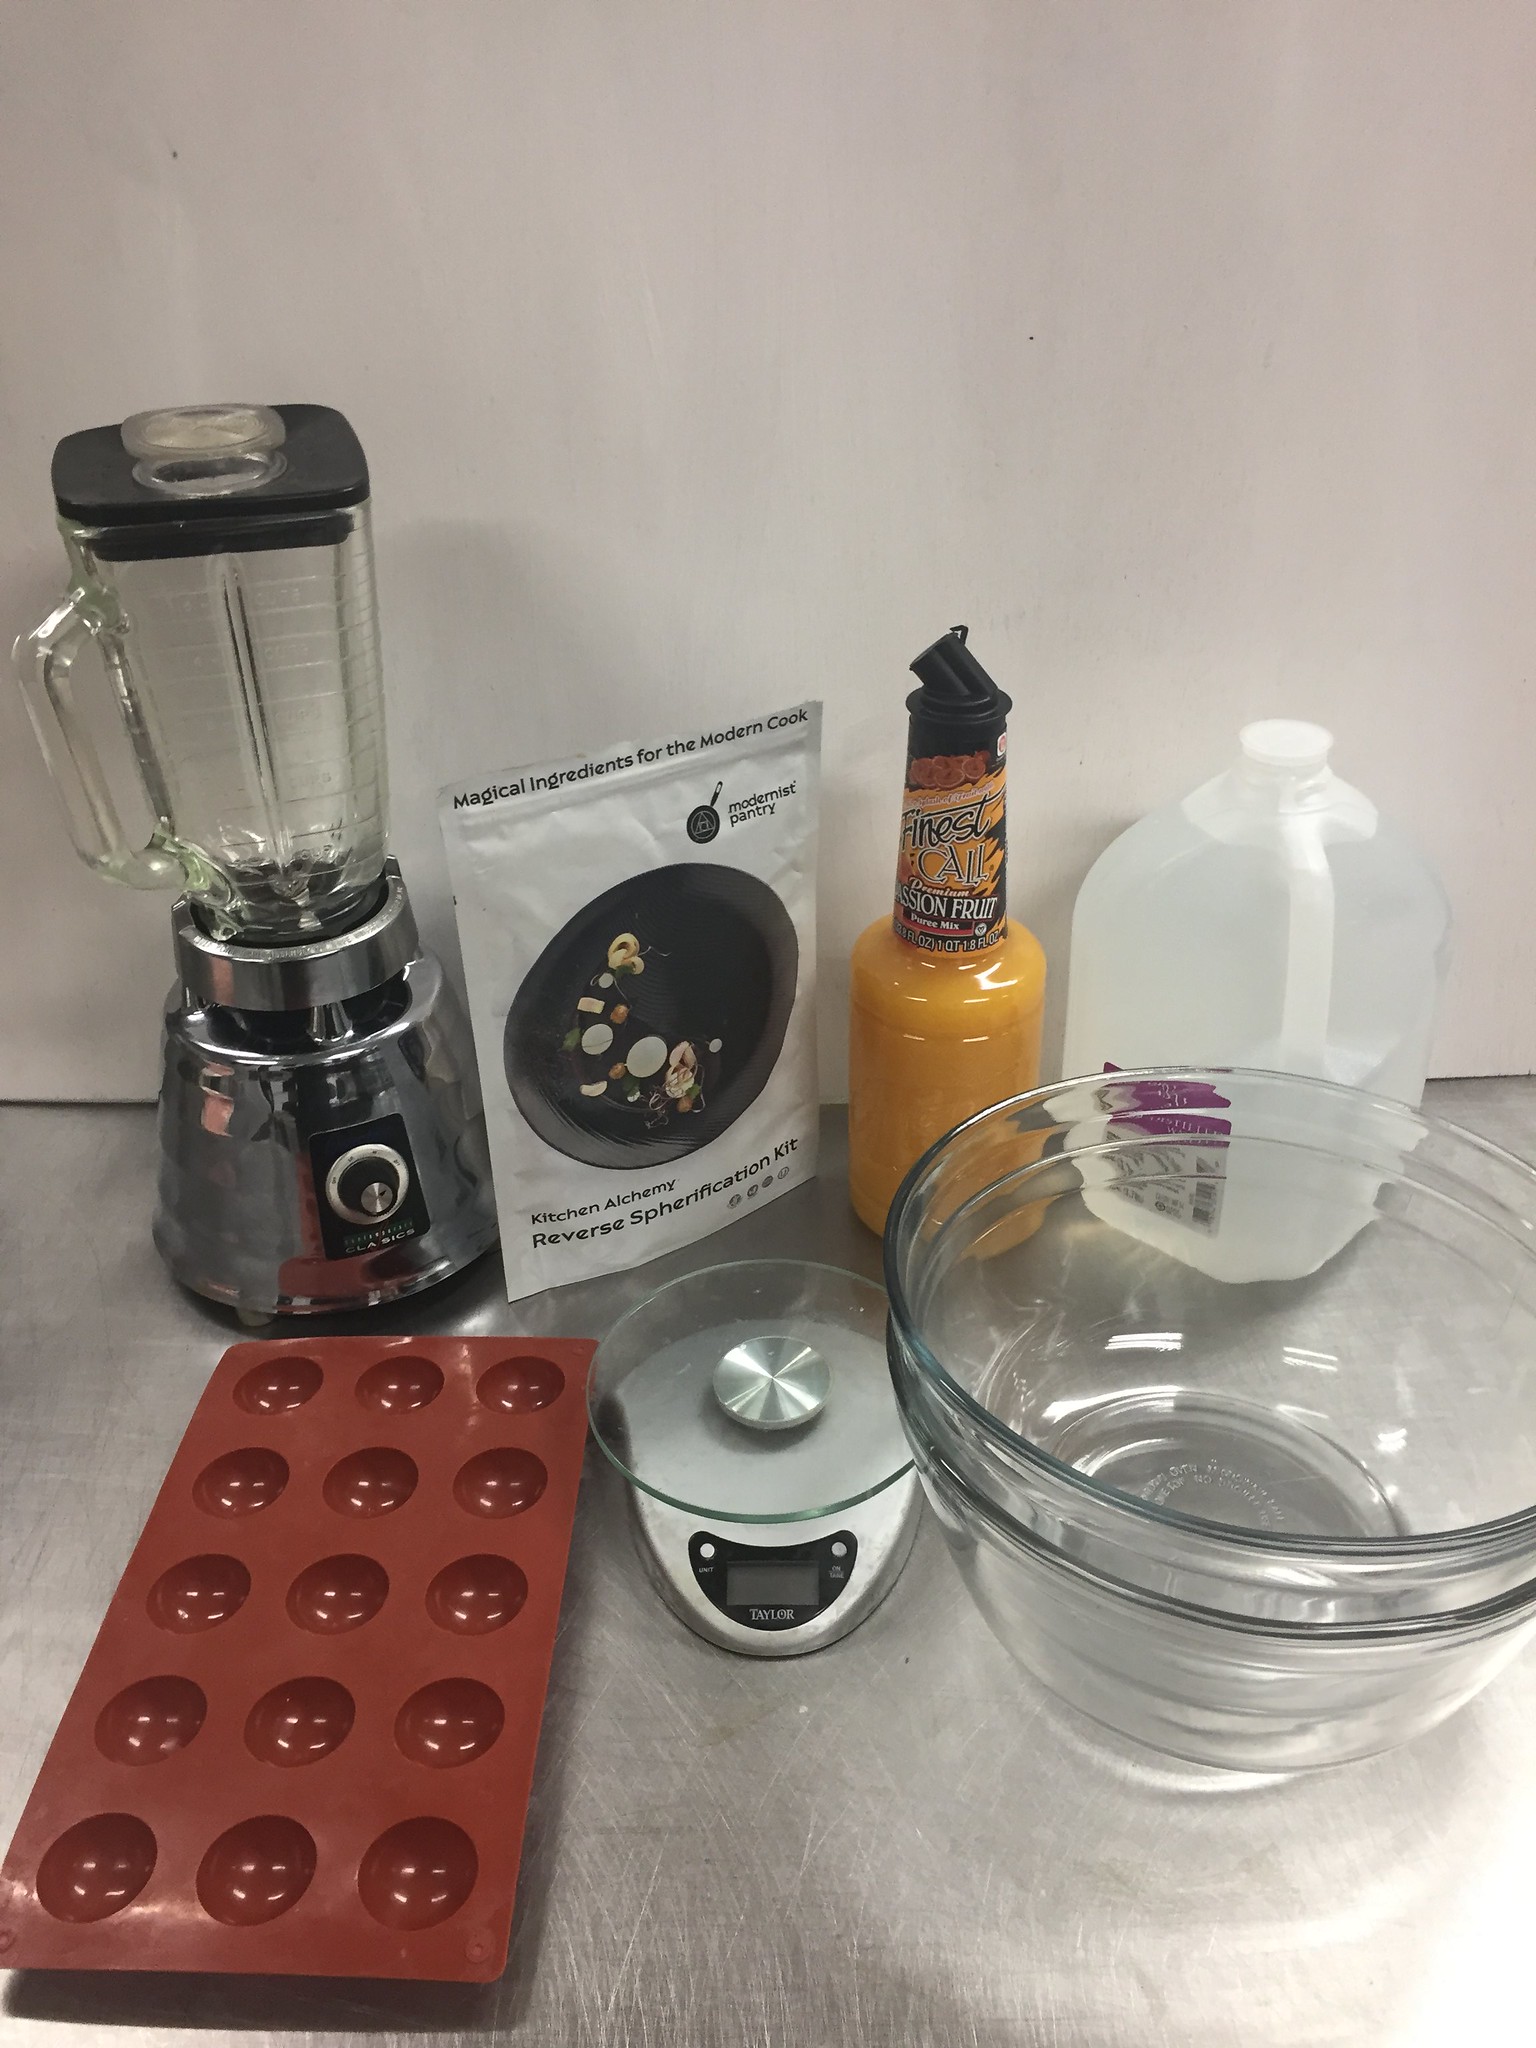
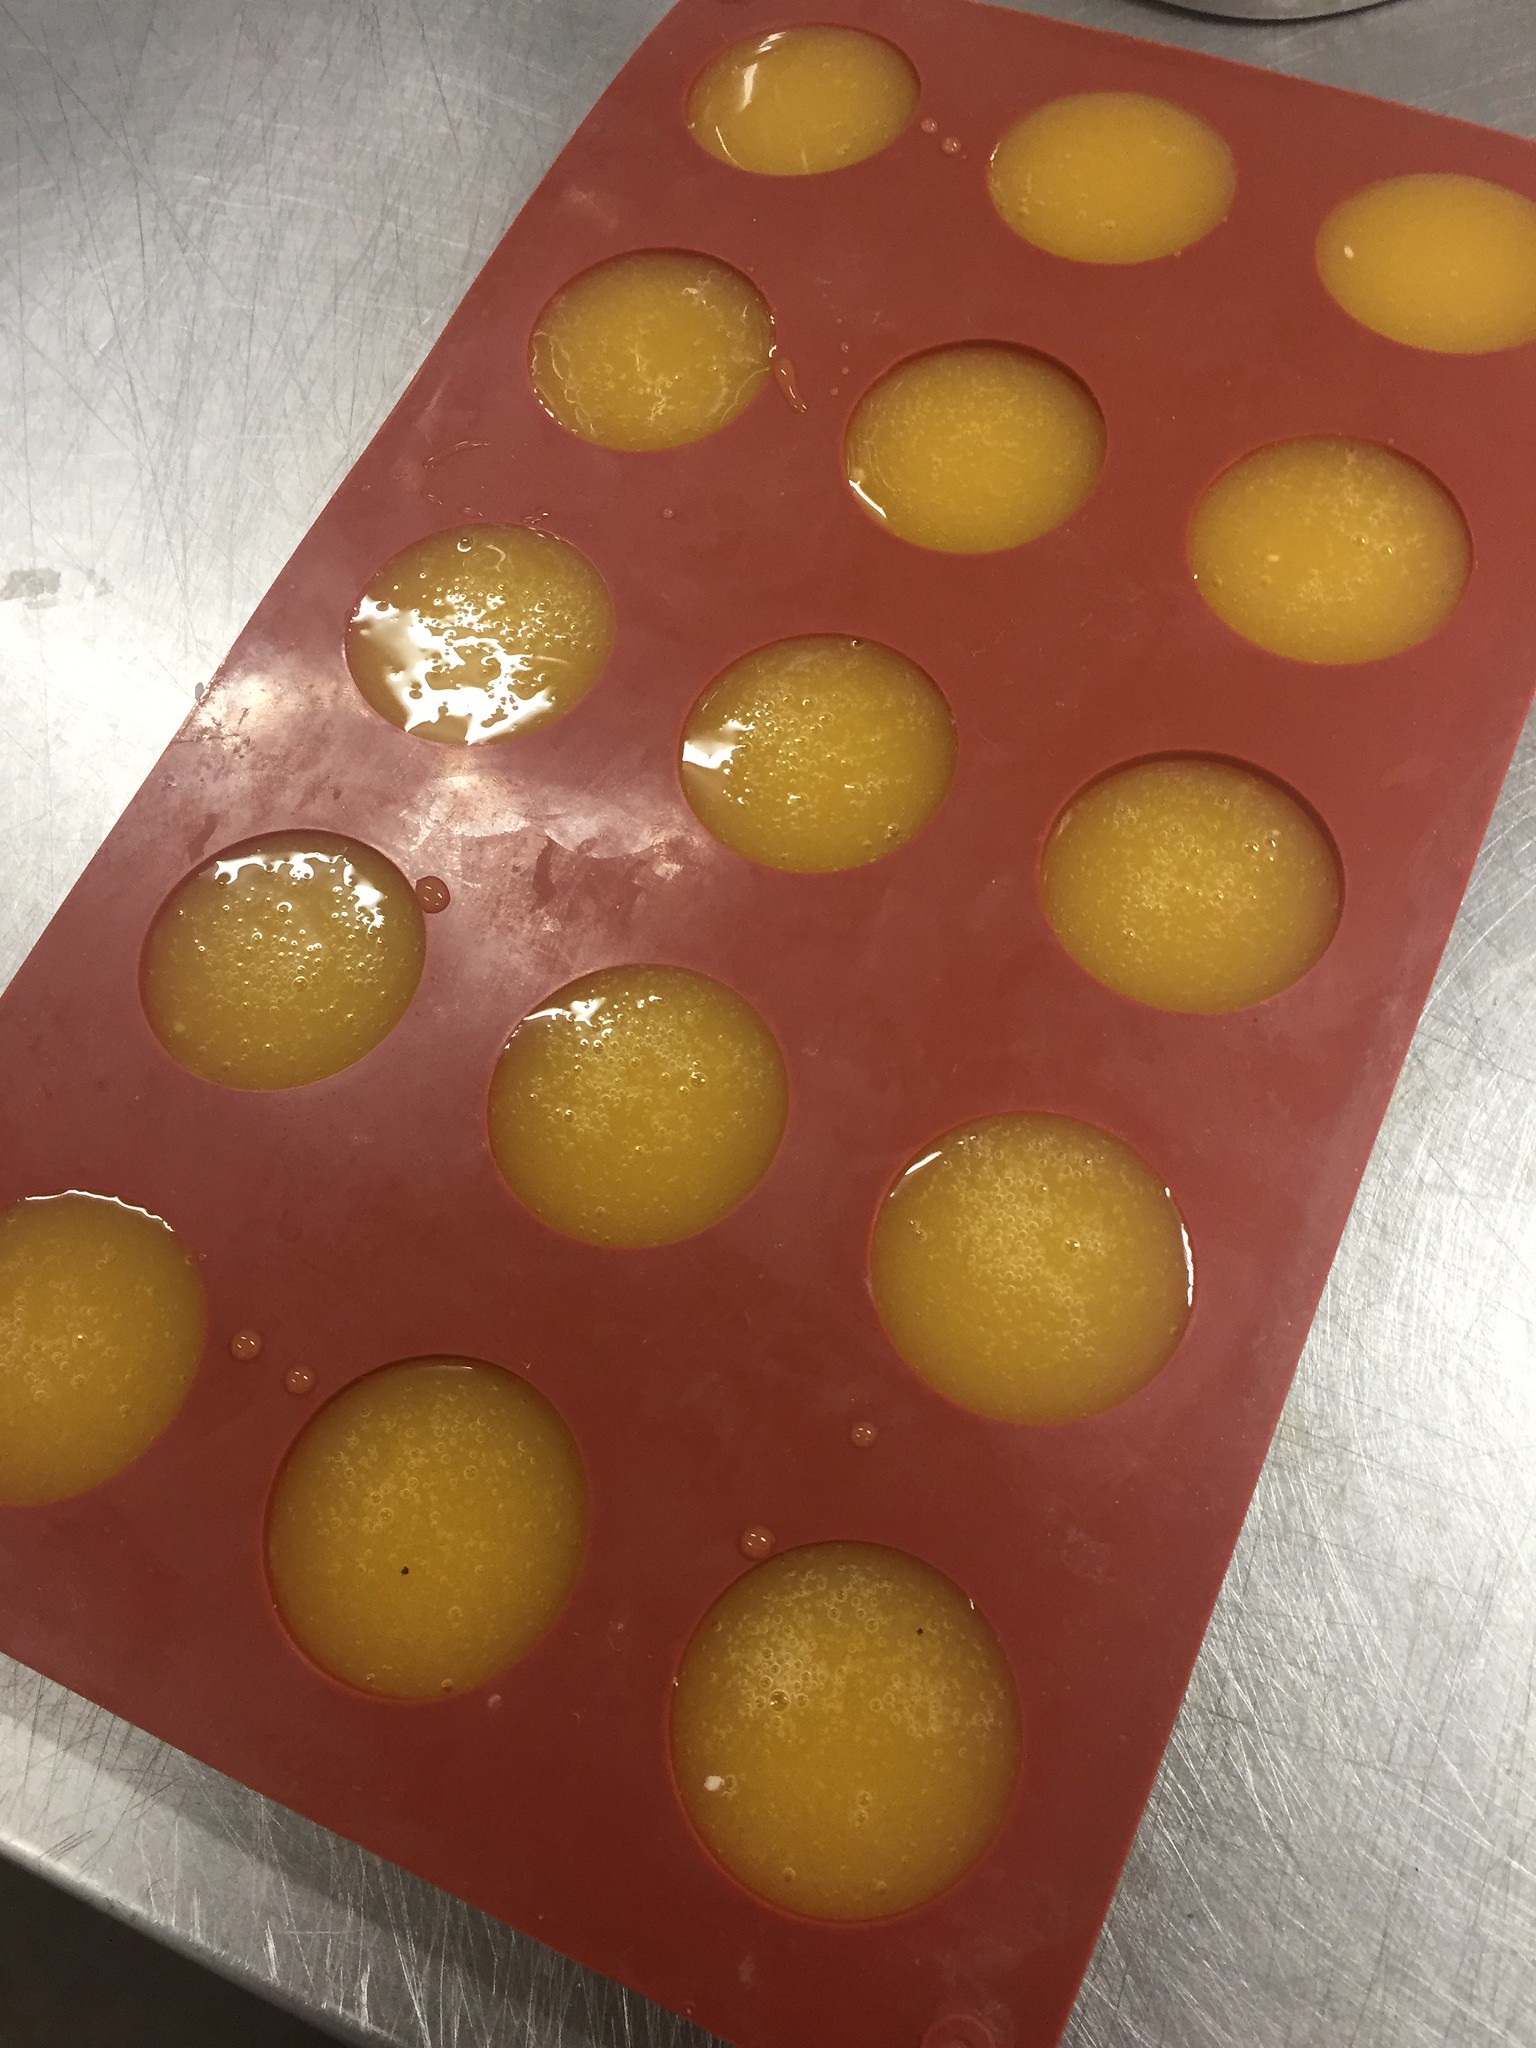
Measure 250g of your liquid and 5g of calcium lactate. Whisk together, pour into molds. Carefully place filled molds in the freezer to set up for 24 hours.
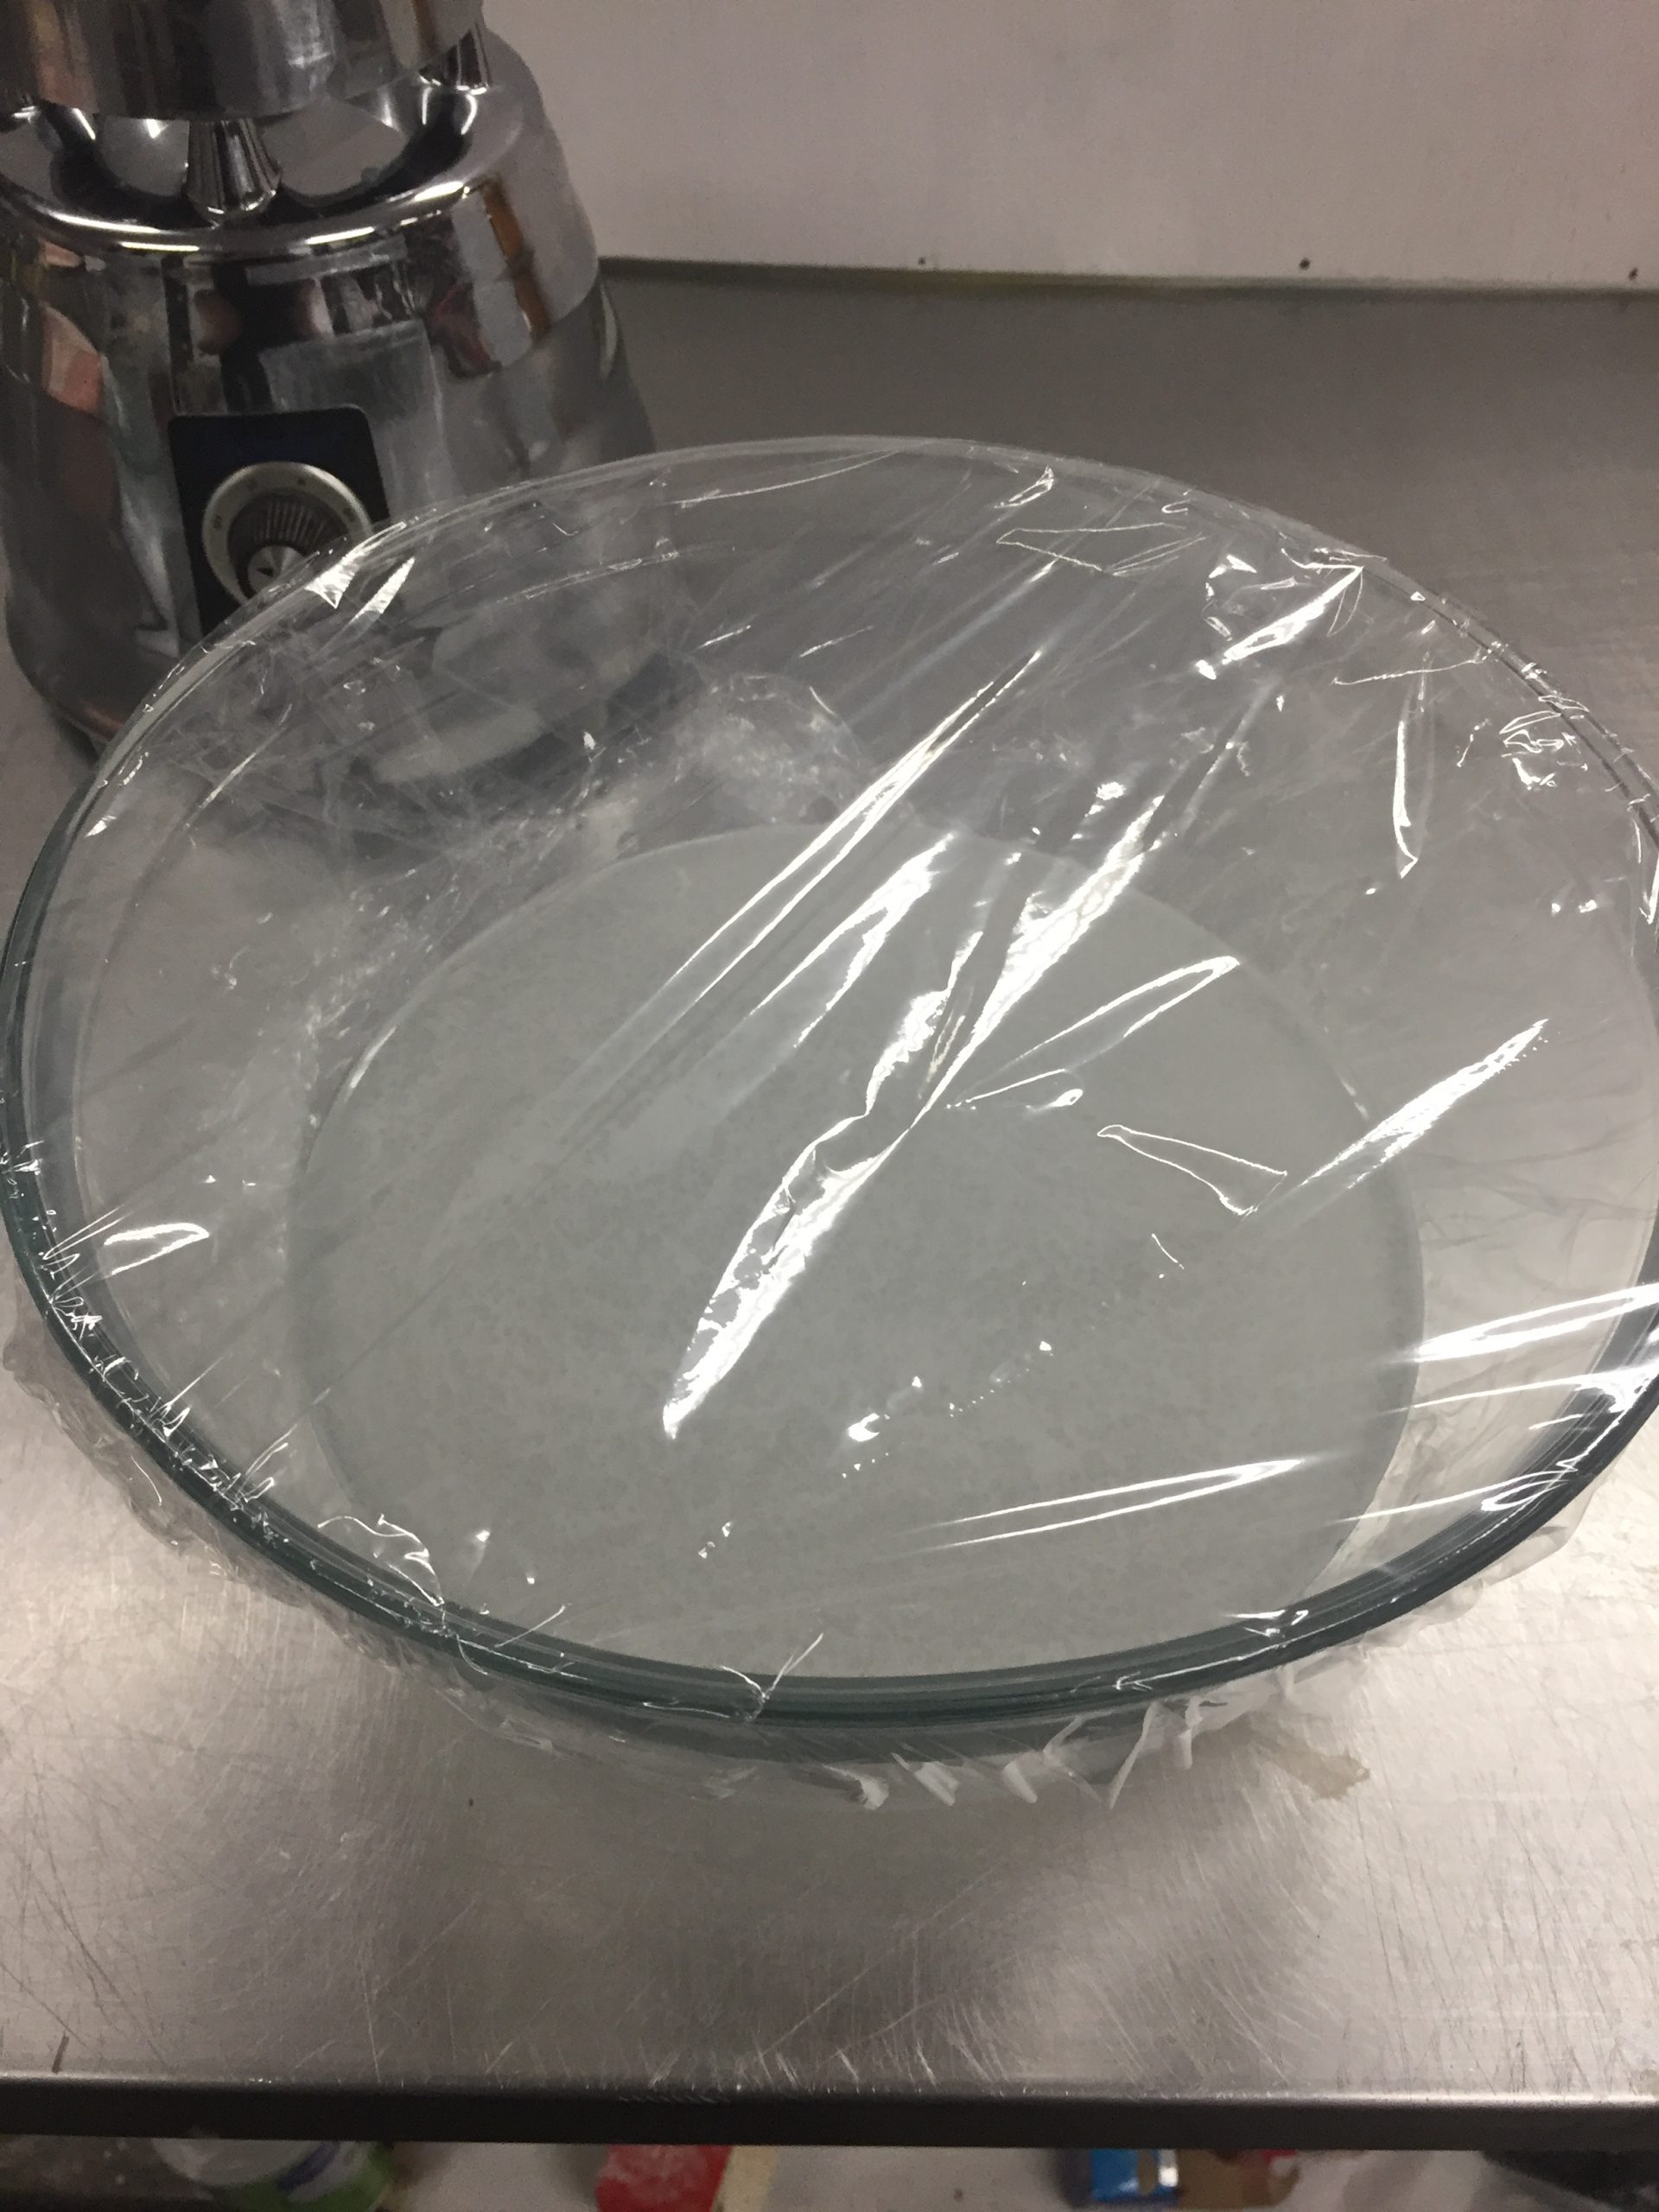
Next, prepare the bath. Measure 1000g of distilled water and pour into blender. Then, measure out 5g of sodium alginate and stream it into the blending water. This should only take a minute or so. Once mixed, pour the solution into a big mixing bowl and cover with plastic wrap. You’ll want to be sure this is bubble-free, so I set it into my fridge to rest overnight.
Now, while my mixtures are freezing/chilling, I get to work on my avocado toast—the perfect breakfast to top with a runny egg.
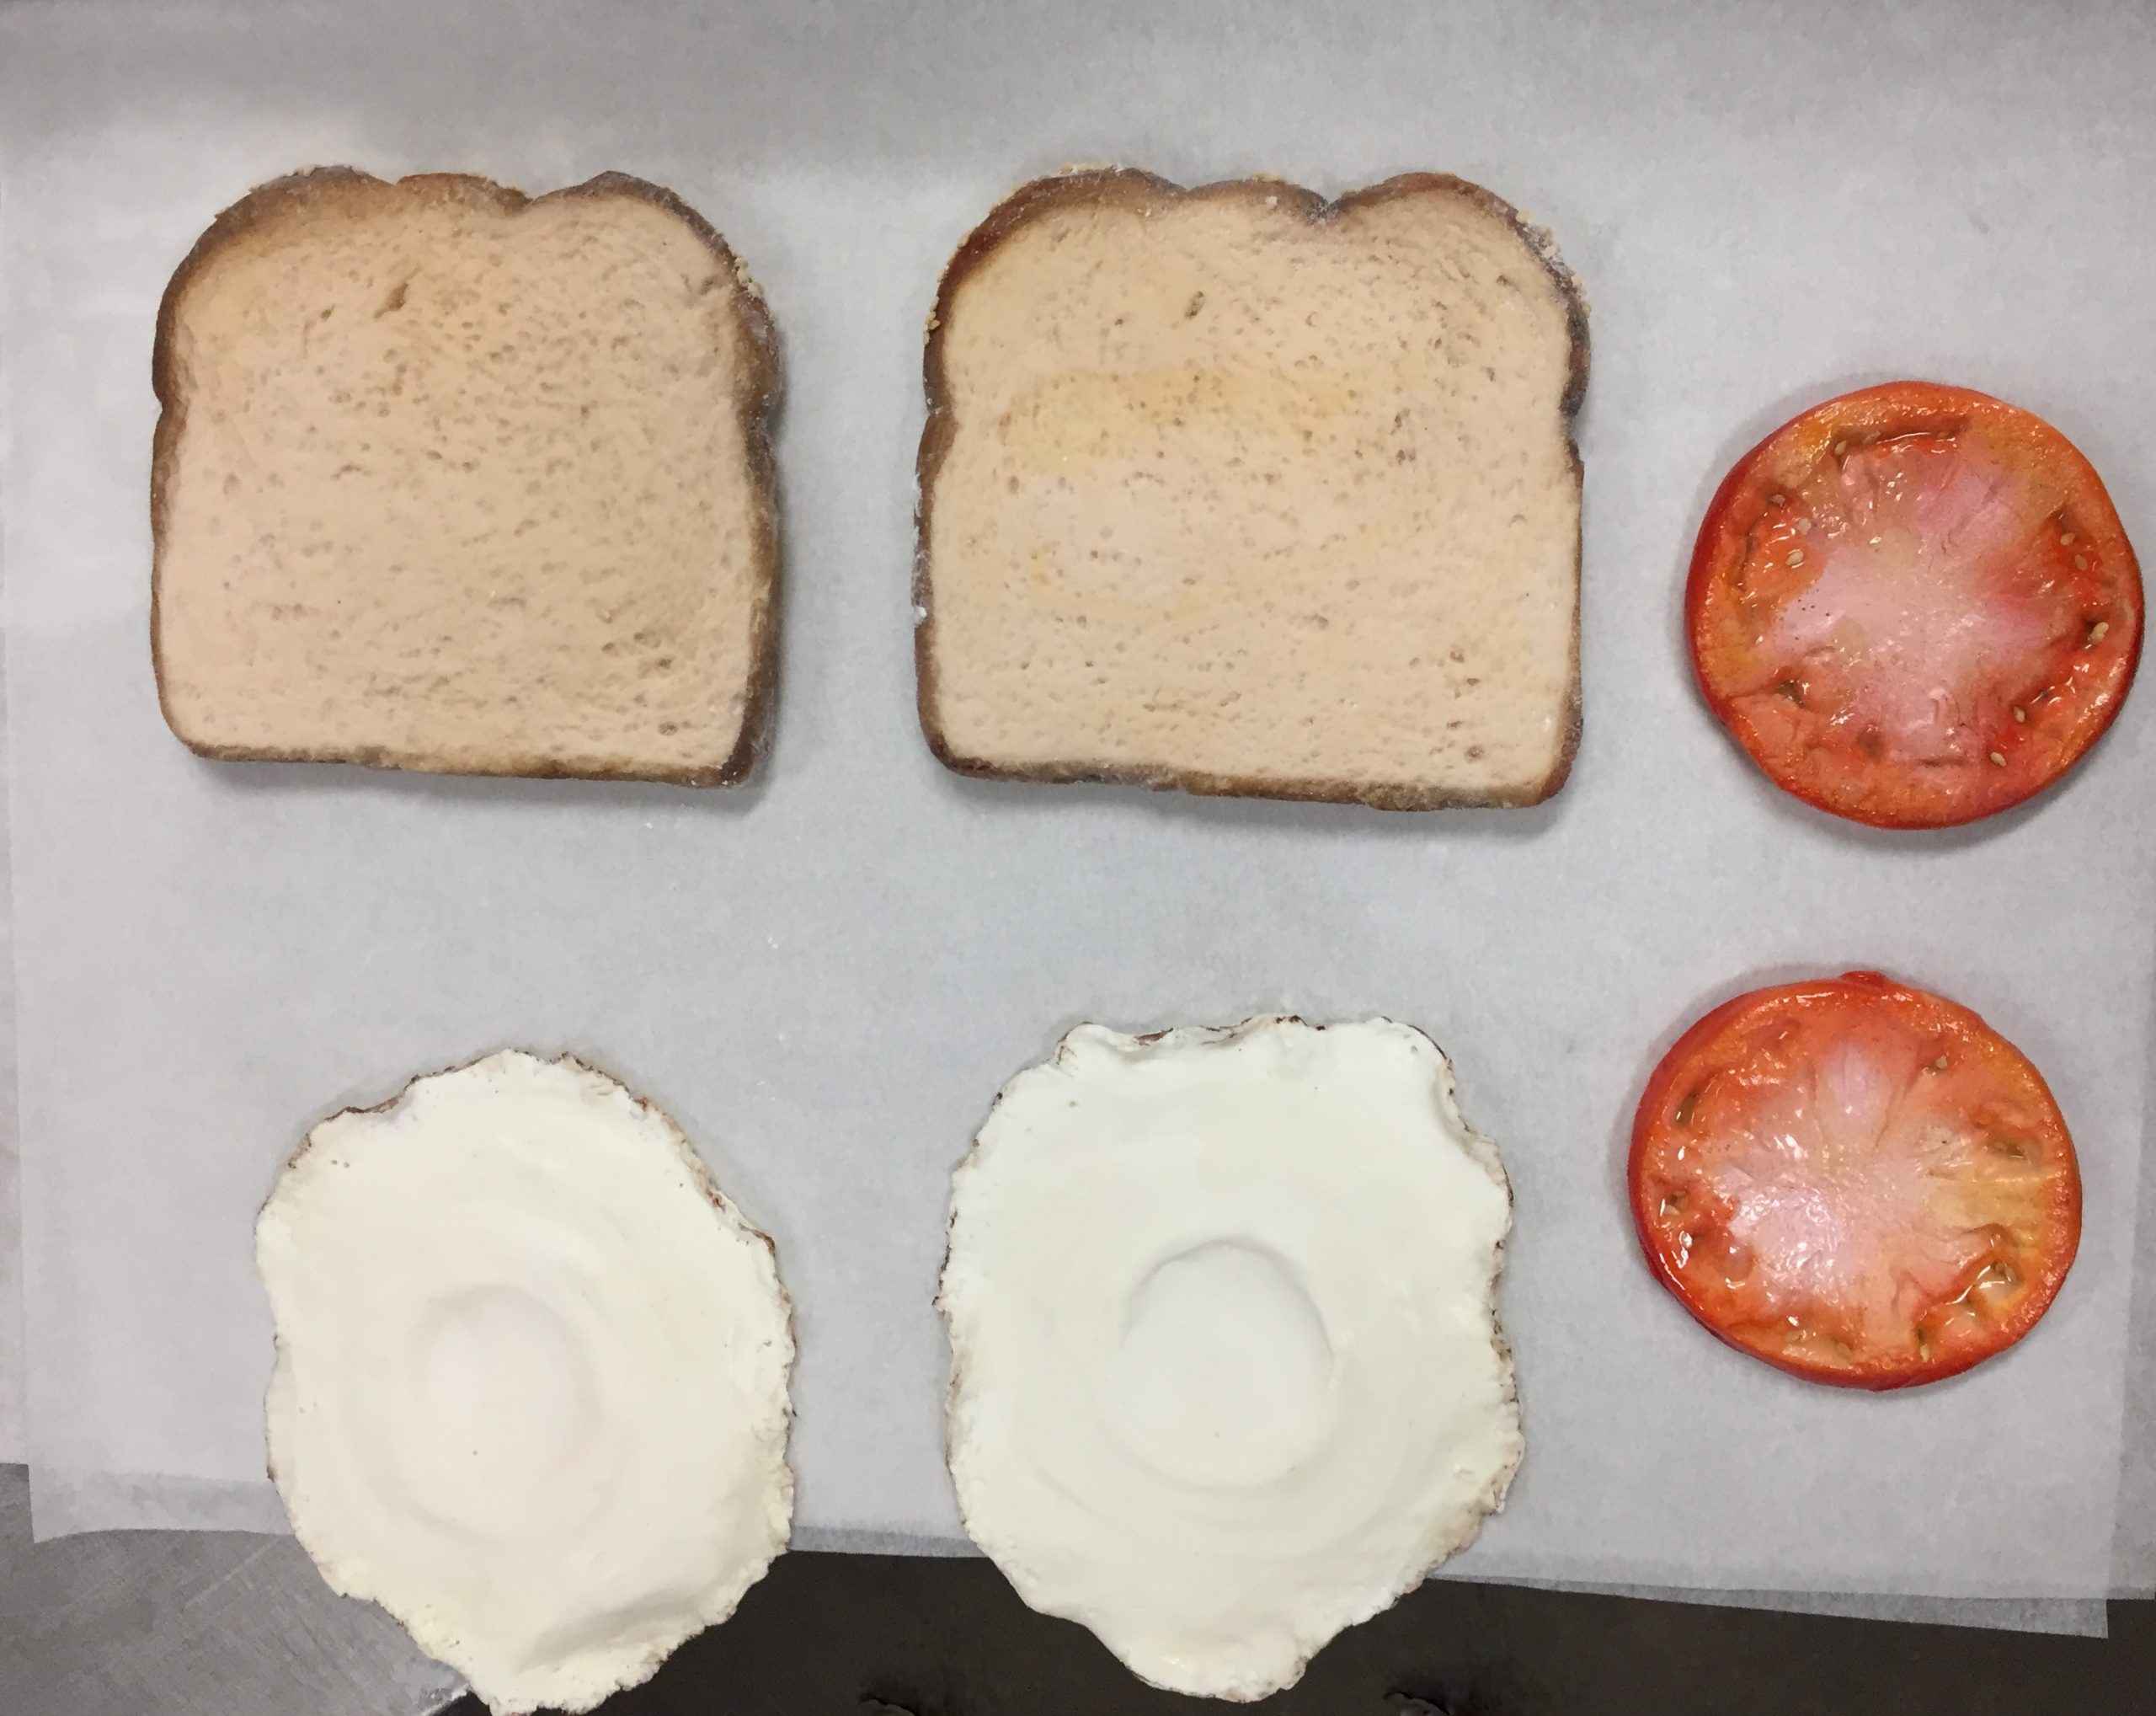
I created two pieces of “toast” out of cake, textured, and airbrushed it for a nice toasty look. And, speaking of toast, I toasted some real sesame seeds and added those to the crust. Since these slices will be mostly covered up, I didn’t bother adding any color to the tops.
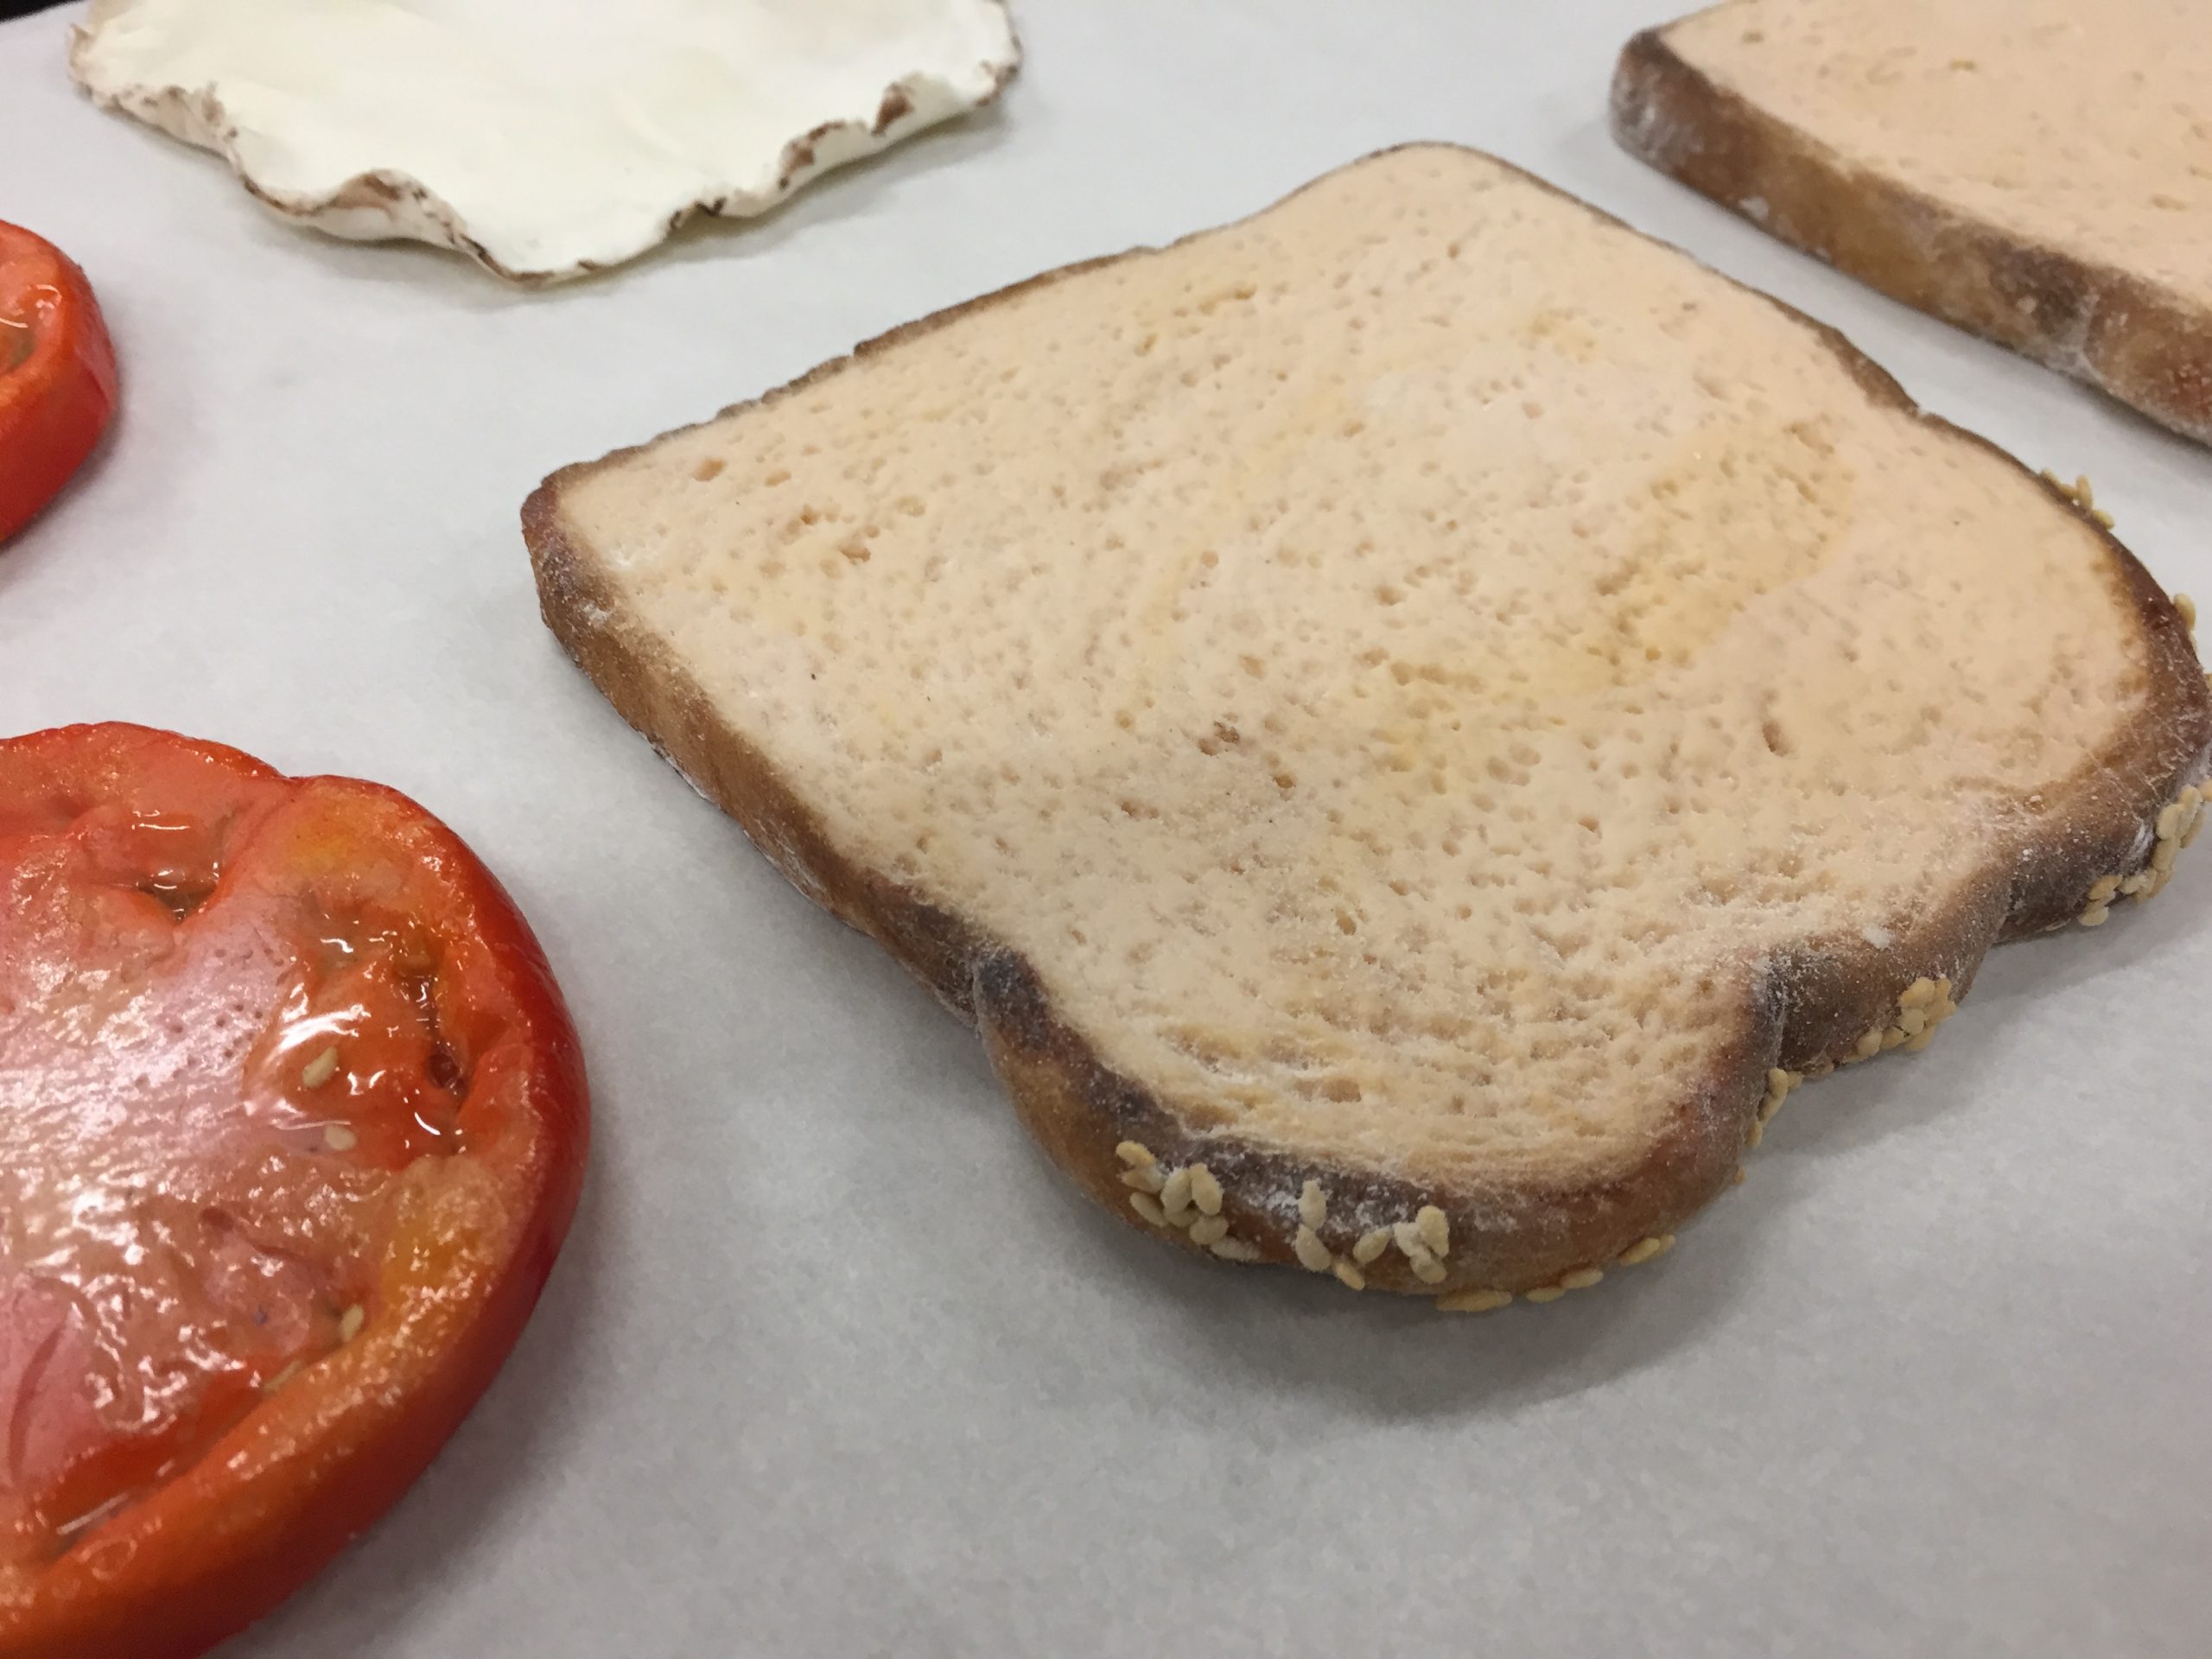
Next, I created the egg whites using white modeling chocolate. It’s important to use chocolate here rather than fondant since the yolks become liquid when pierced, and we all know how much fondant loves liquid. I cut out realistic egg shapes, thinned and curled the edges, and painted on just a little bit of brown color for a crispy look. Using a ball tool, I indented the centers roughly 1.5”. This will be where the yolks will rest. For a bit of color, I decided to also make a couple of quick tomato slices.
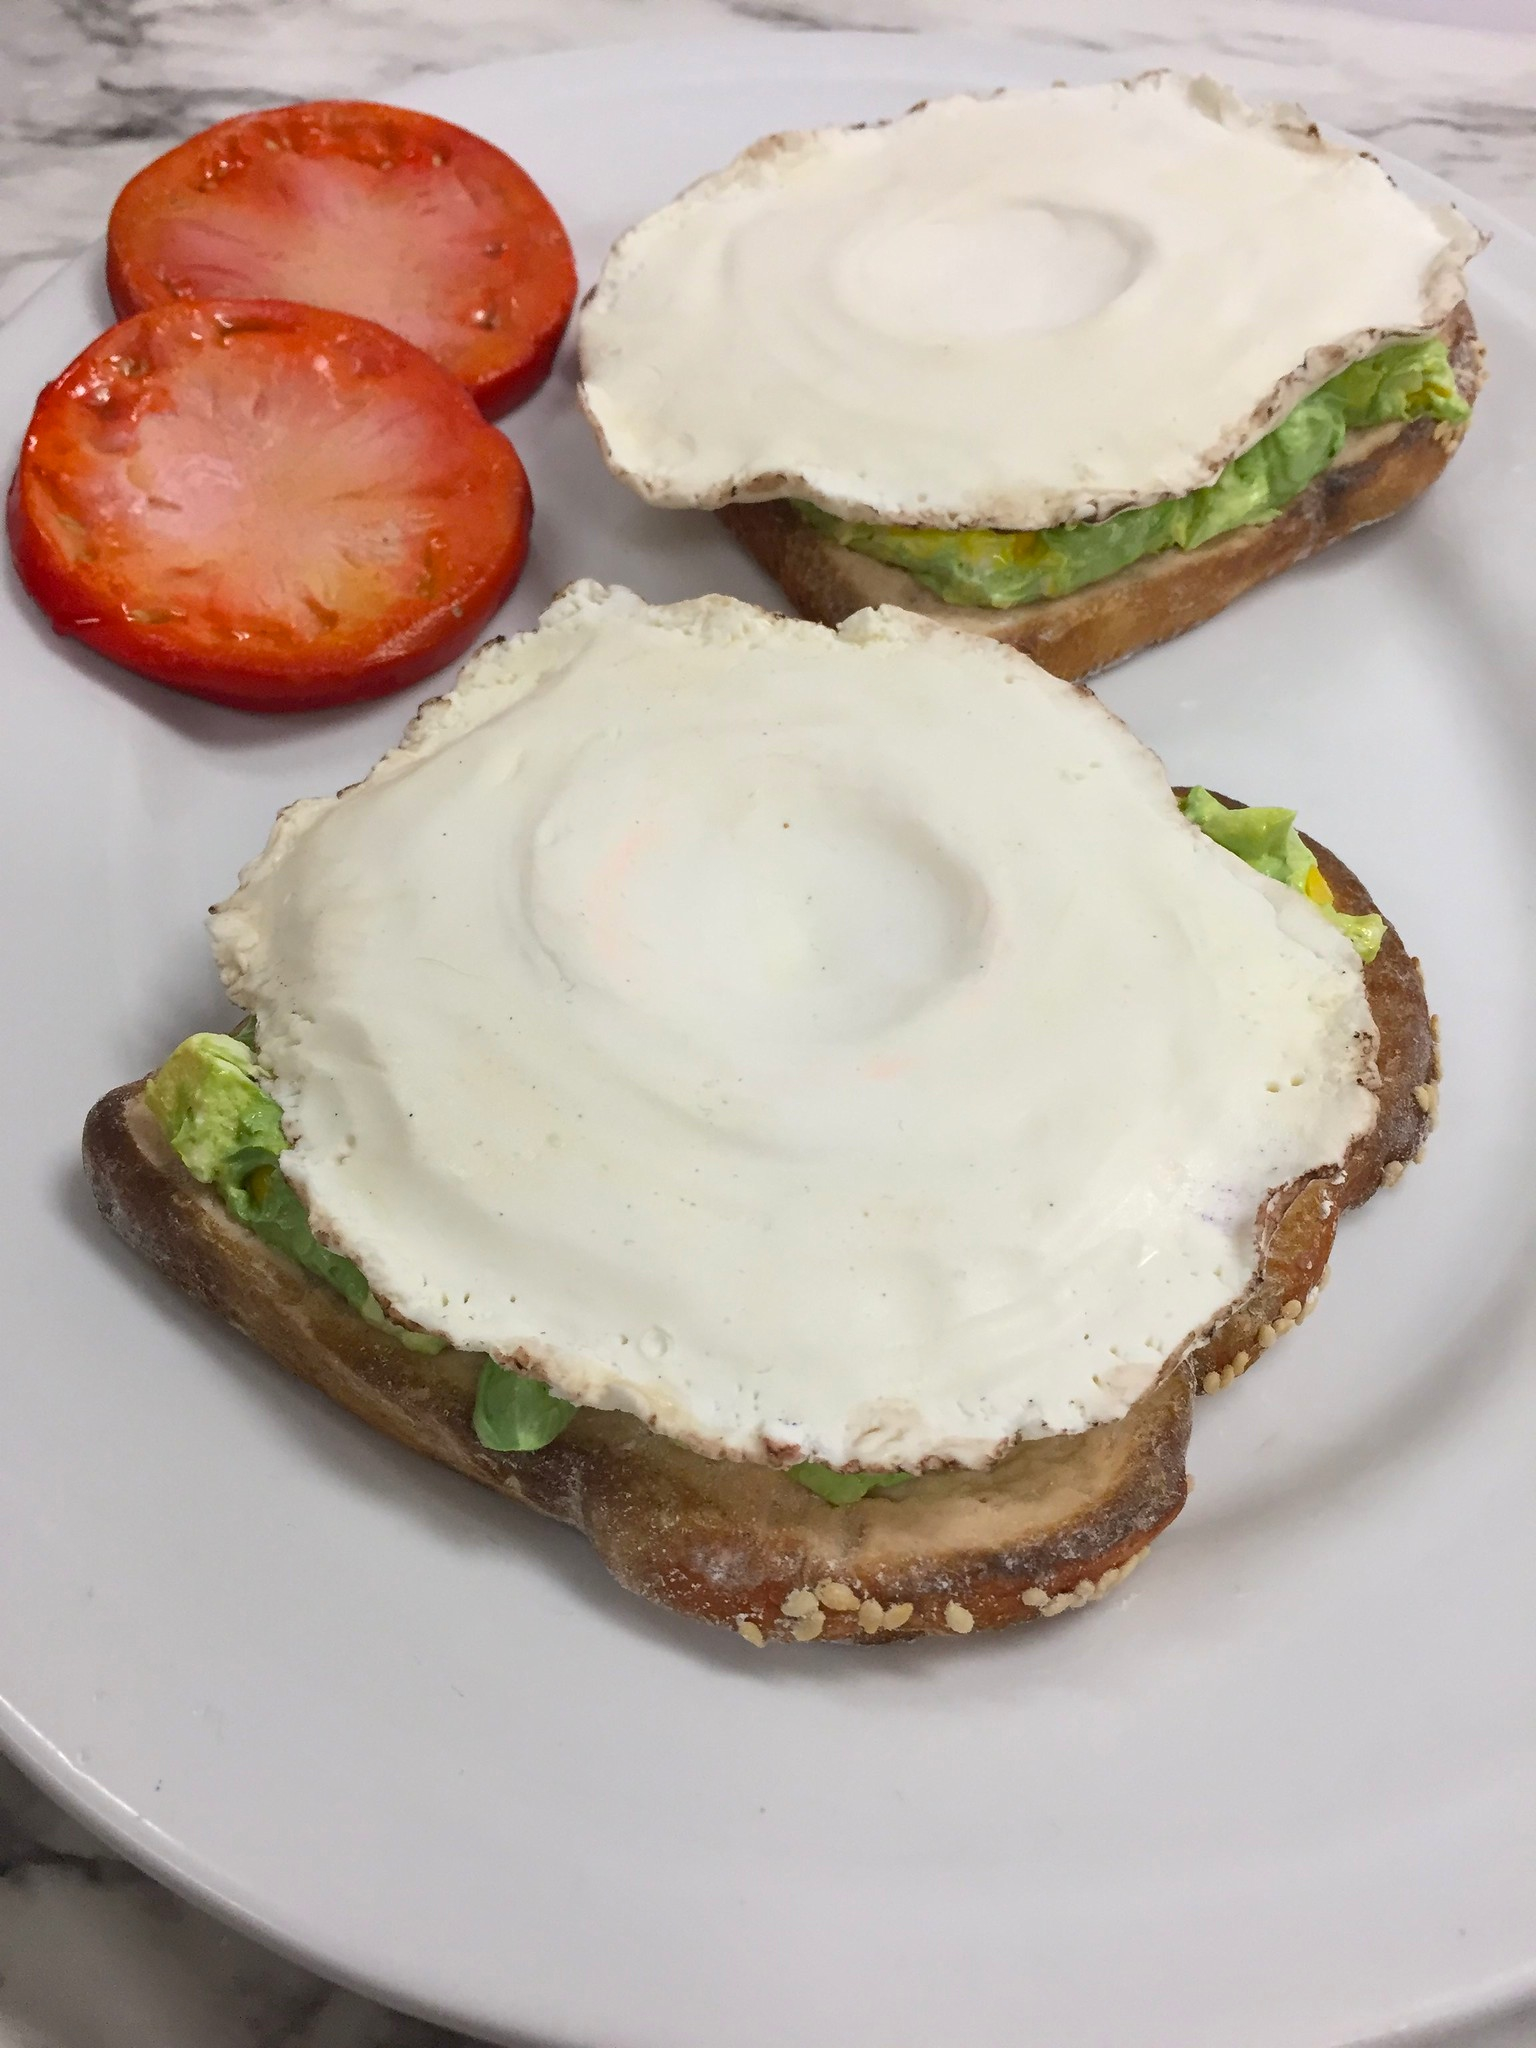
The next day, I mixed three shades of avocado green buttercream using an all-butter buttercream that sets up very firmly when chilled. I knew I wanted a “chunky” look for my avocado, so I iced a thin layer of two of the shades of buttercream onto some parchment and froze them for about 30 minutes. Once firm, I roughly chopped up the chilled buttercream and folded it into the non-chilled mix. This worked great! I gently spread this onto my toast slices, making sure some bread was still visible.
Now it’s showtime! Be sure you have your toast (or whatever you’re topping with your egg yolks) ready to go because you’re going to quickly need to transfer them to their resting spot.
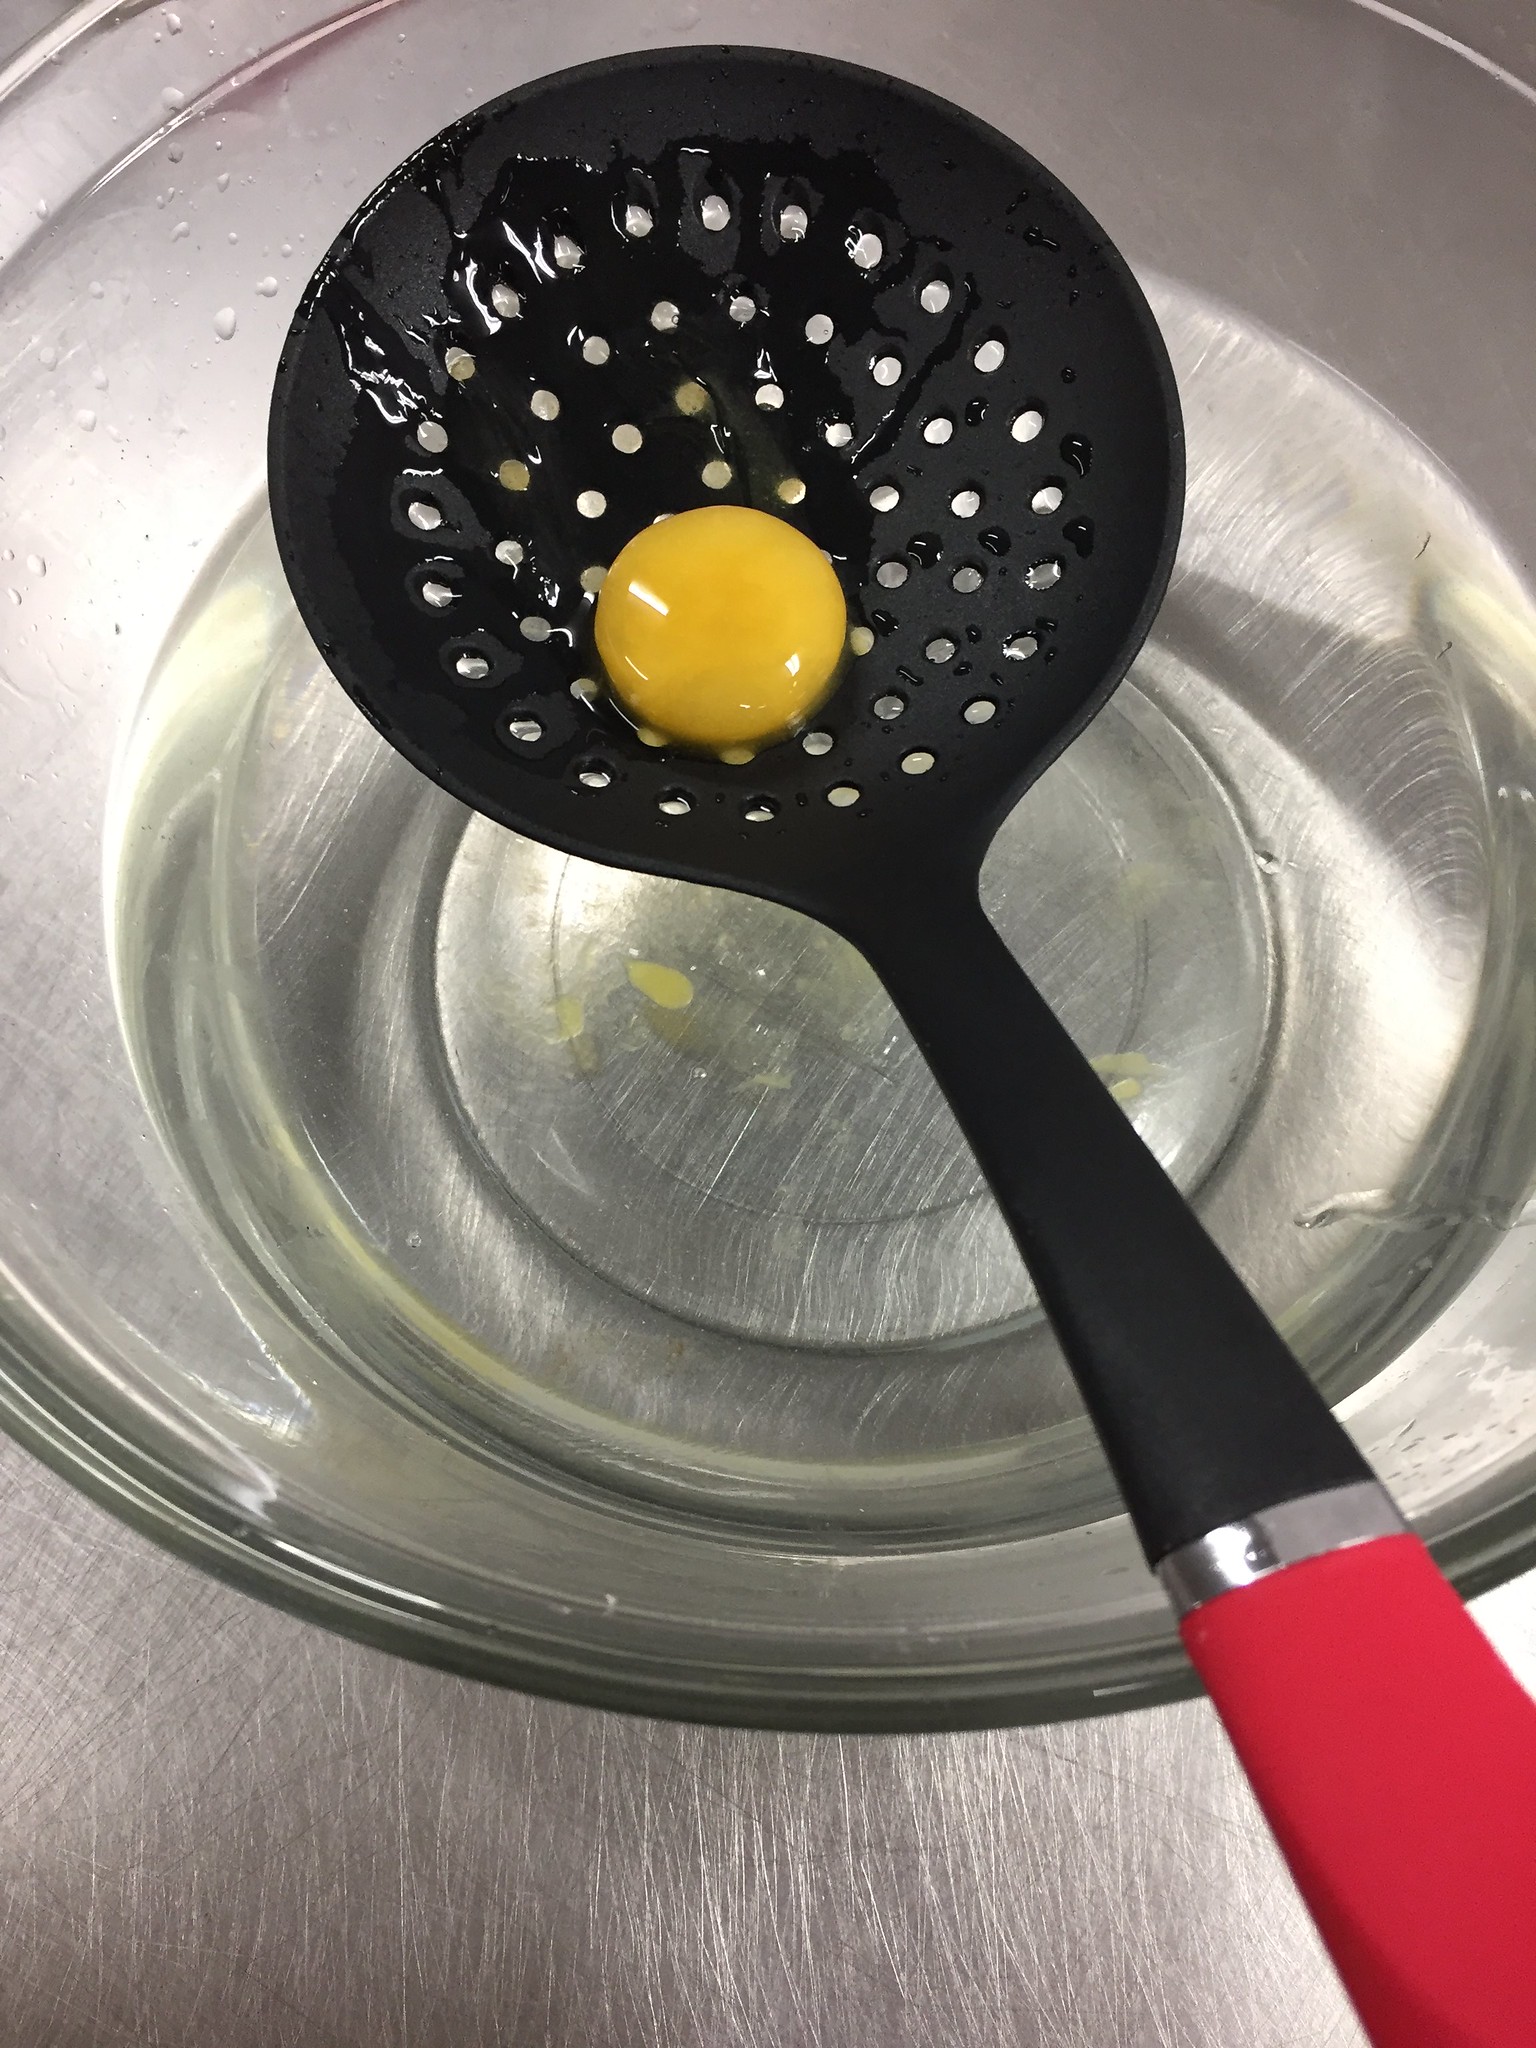
Remove the bath mixture from the fridge and warm in the microwave to 150 degrees. Fill a second mixing bowl with clean, warm tap water.Carefully place the frozen yolks in the alginate bath, either one or two at a time, careful not to have them touch. I then swirl them around using a slotted spoon. Place those yolks into the warm water bath and drain in spoon. Immediately put into place.
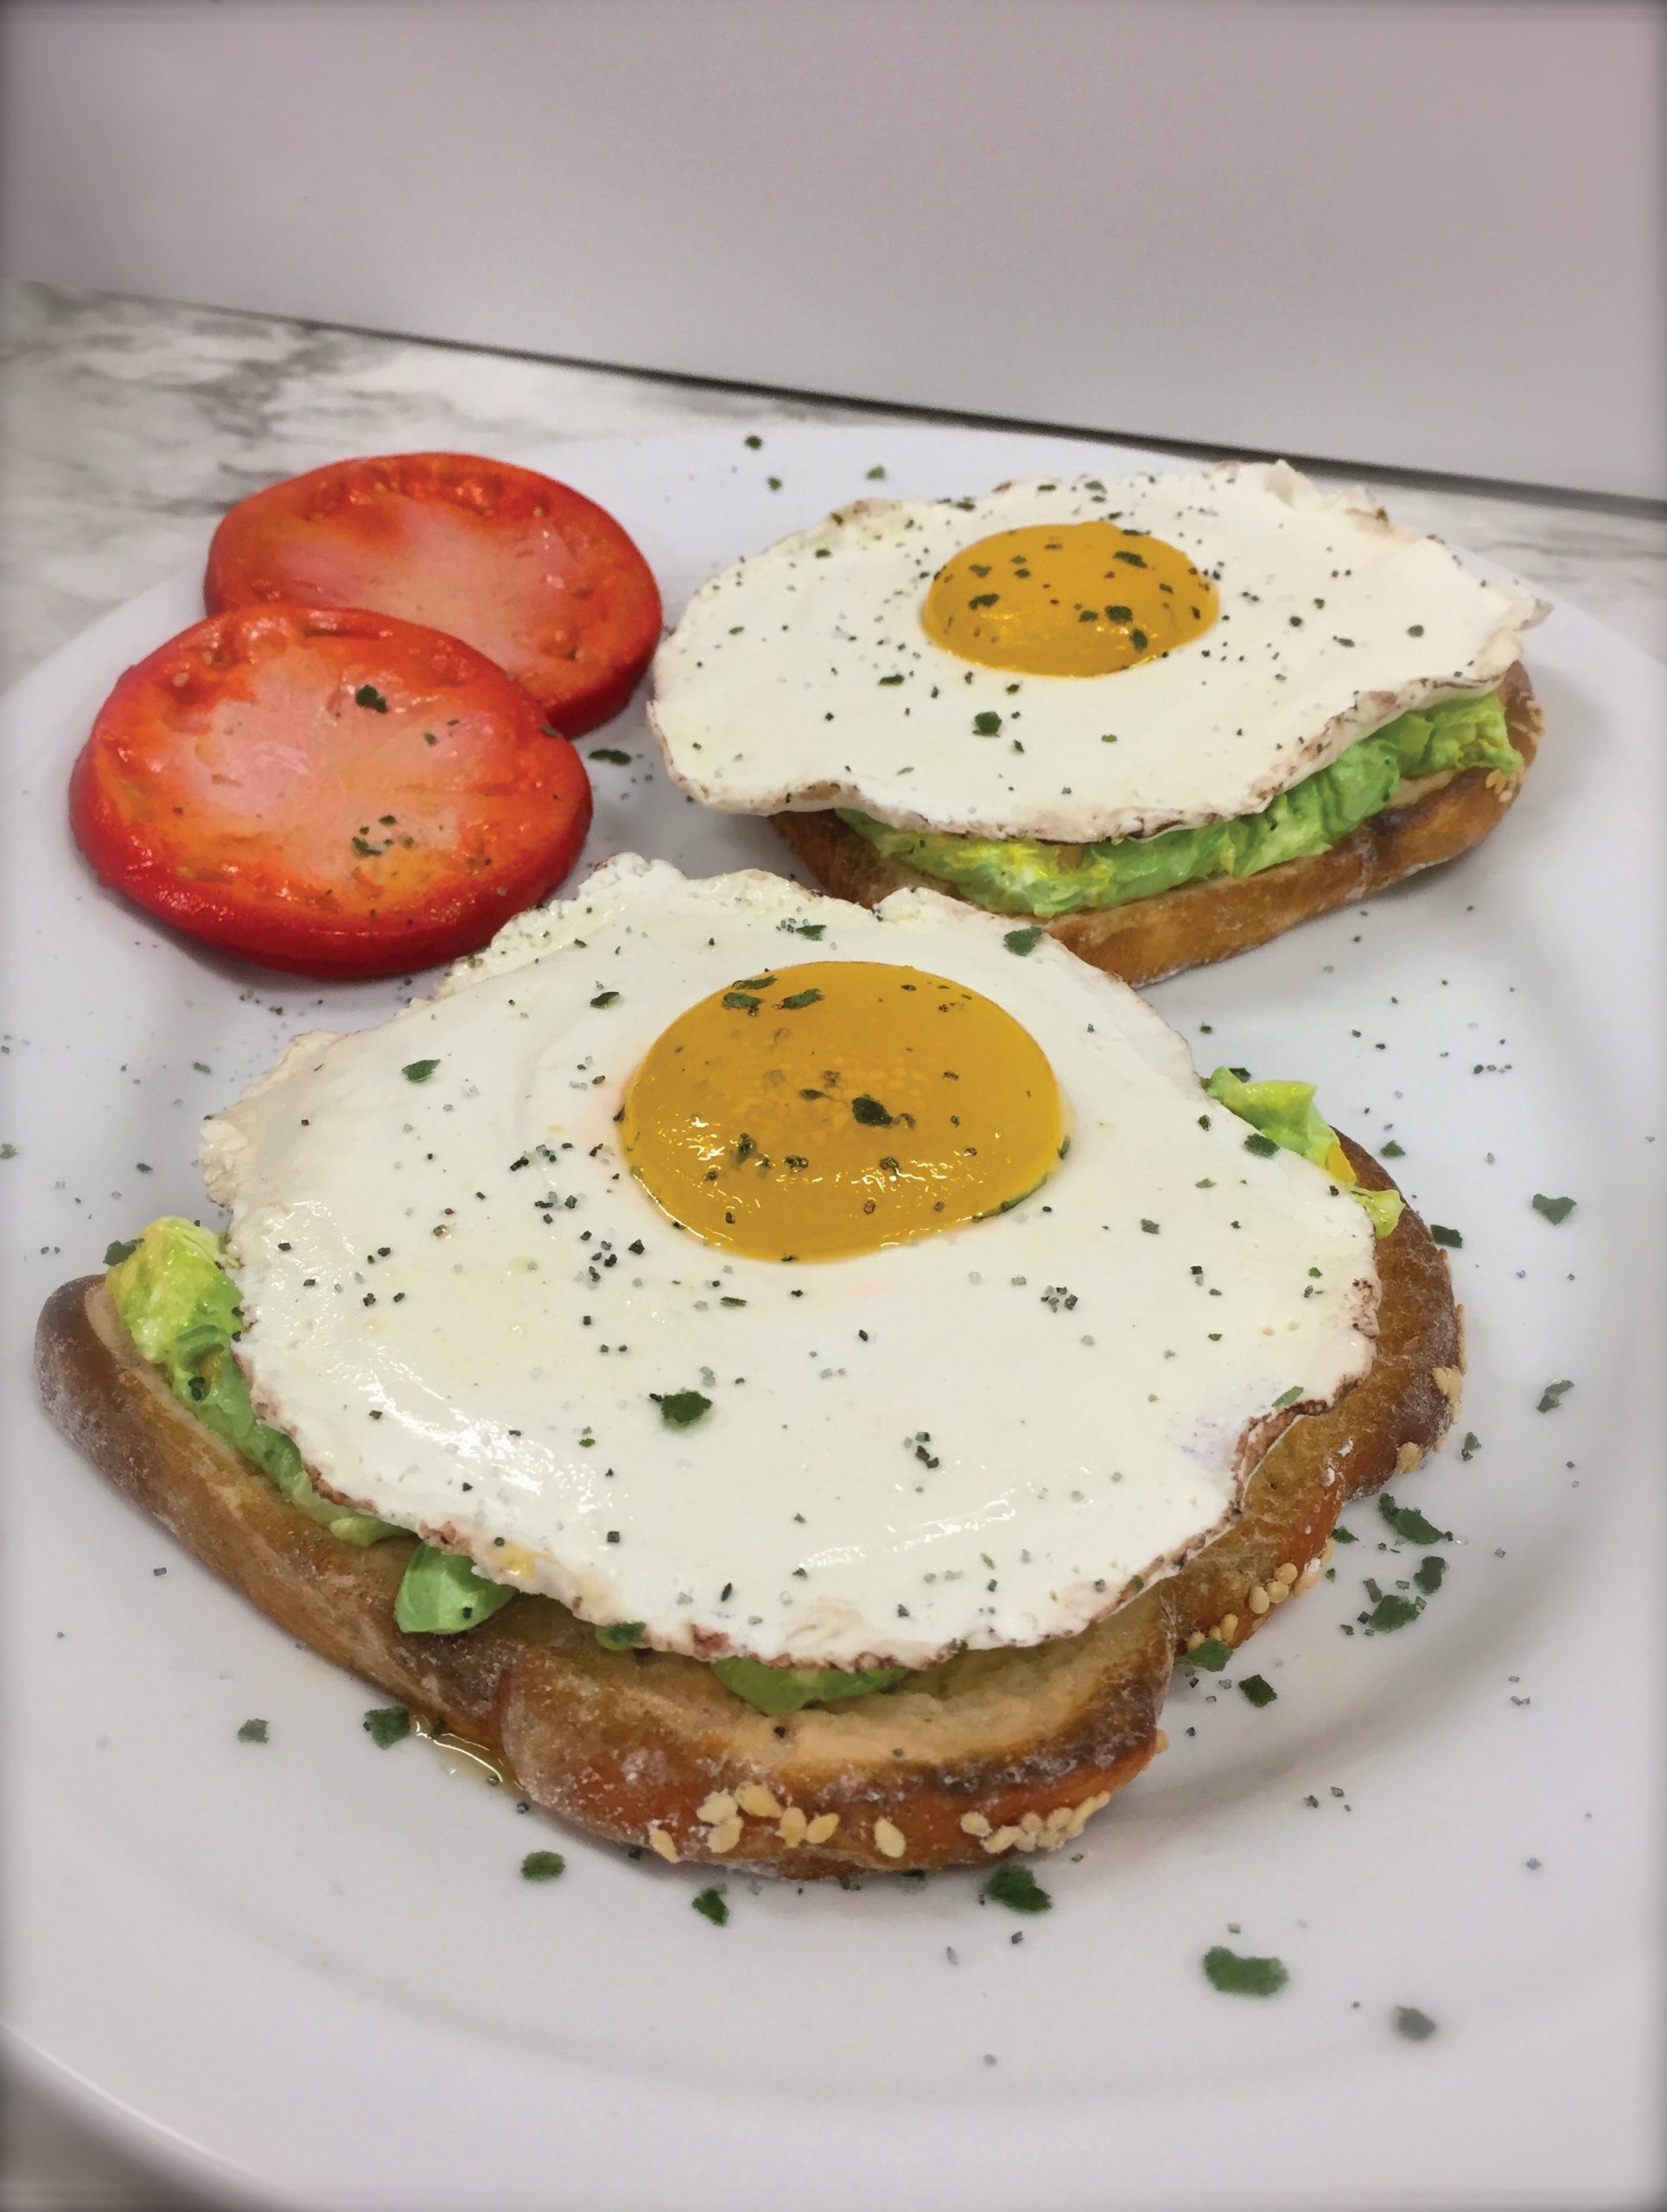
WOW! My yolks turned out just as I had hoped after all that time of planning (and procrastination)!
I sprinkled on a bit of sanding sugars to create a look of salt and pepper, then crushed some wafer paper for spices, and now the illusion is really complete!
But wait—would the yolks really “ooze”?
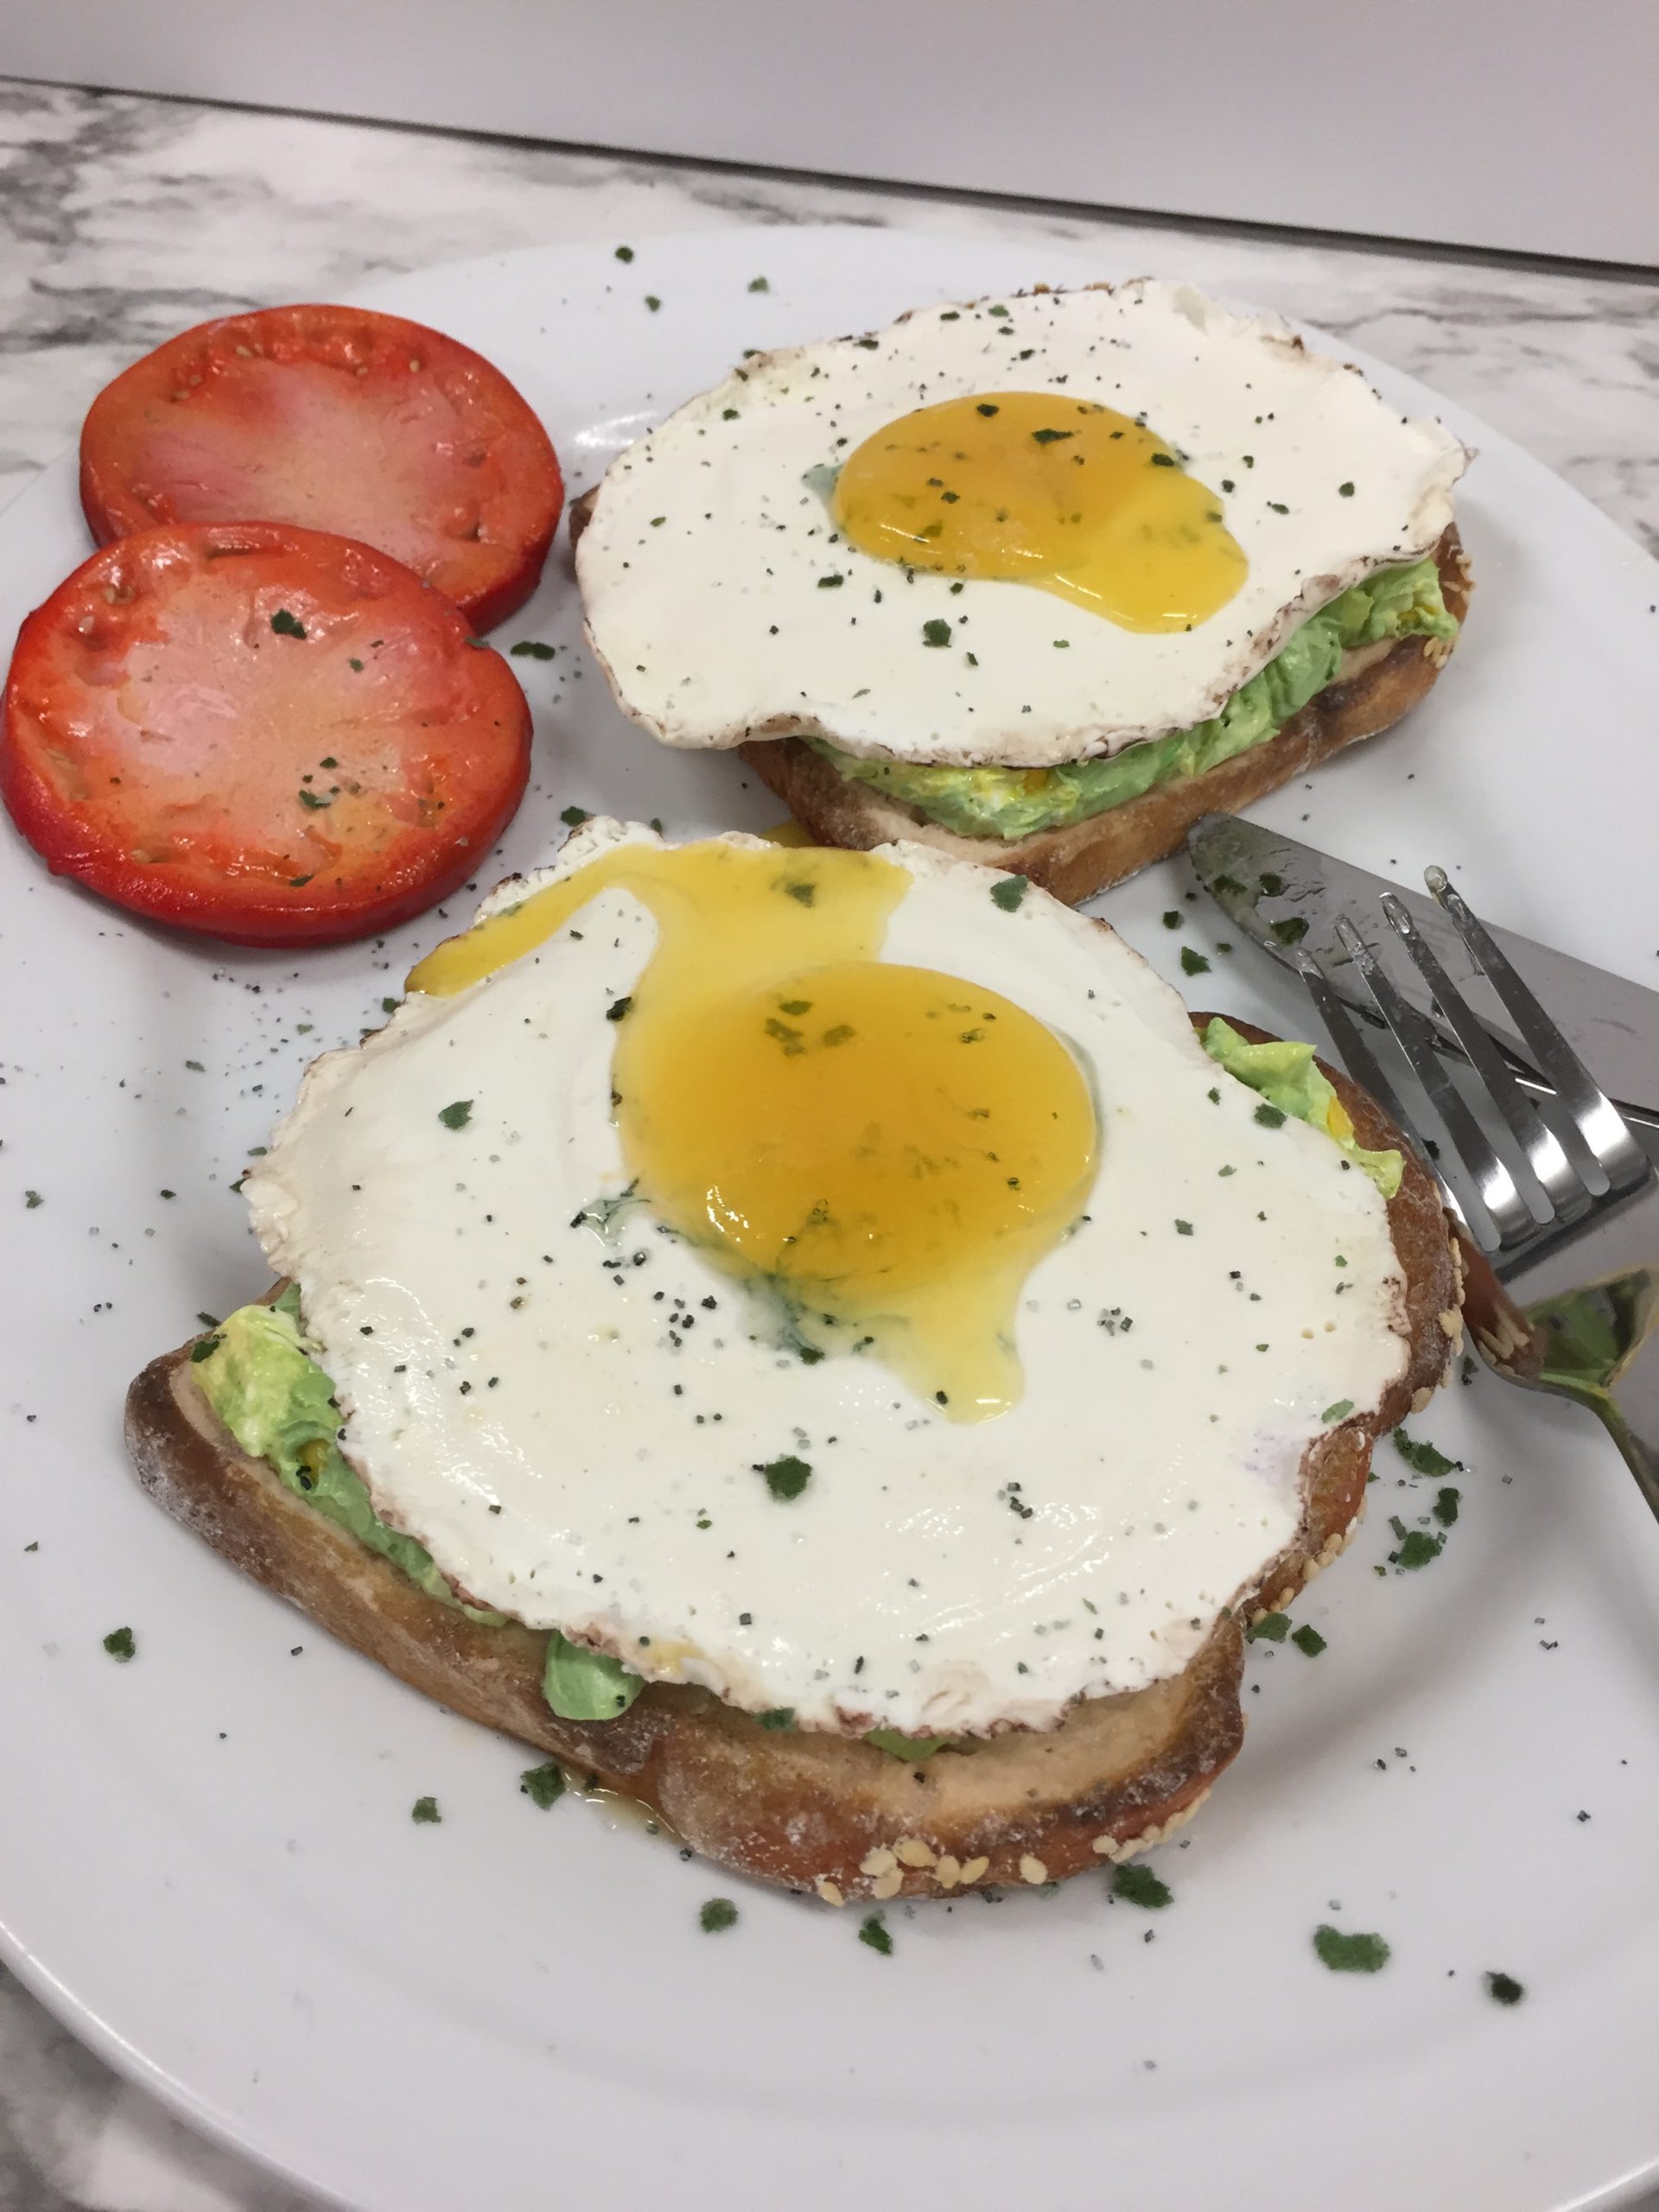
The moment of truth arrives. I pierced the yolk with anticipation and my jaw dropped! Perfectly runny eggs! I did it! After years of dreaming about this project, I finally brought it to fruition and it felt so good.
I hope you guys enjoy this technique as much as I do and will be inspired to try your hand at molecular gastronomy. With a bit of creativity and the help of a little science, the possibilities are truly endless.

I loose eggs slash runny yolks - yet those in the pictures seen to be.... not real.
This is awesome. I saw the cover photo and thought, "Why is there an egg toast recipe here on a cake-decorating site?!?" Bravo.
I'm really at Aww !!!! How simply said , it's beautiful !!!