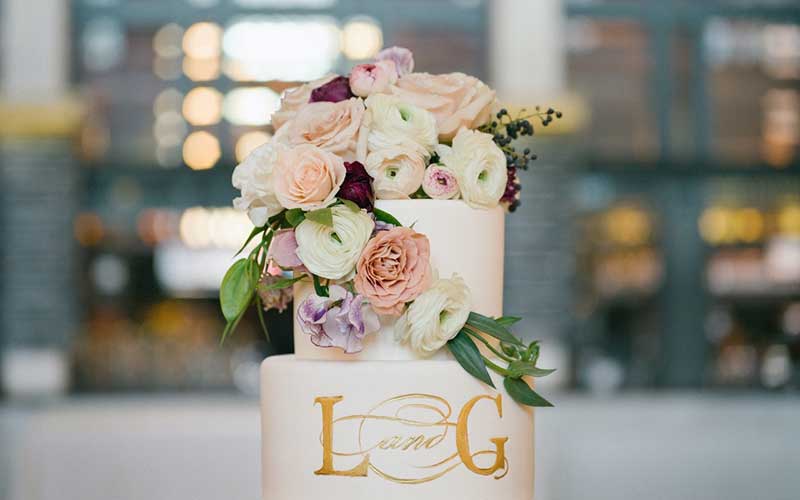
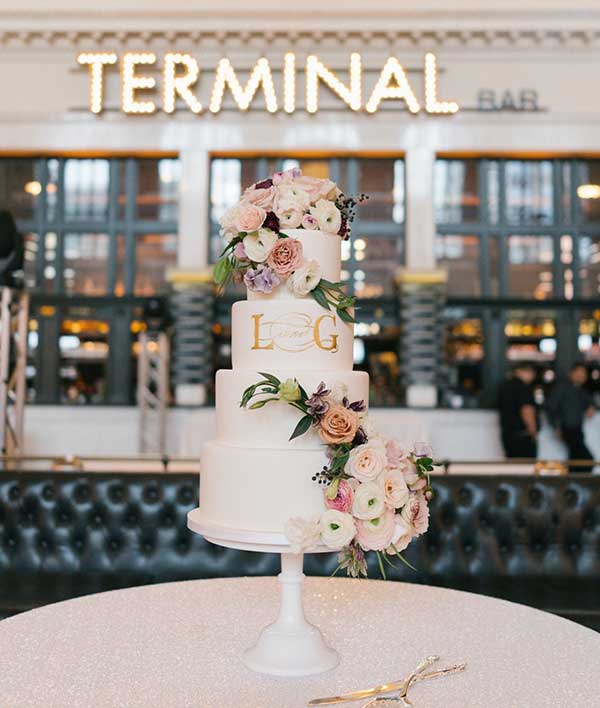
 Monograms have been a part of history since the Middle Ages. While they were originally a way for artists to claim their work, monograms eventually transitioned into purely decorative embellishments and a nice way to personalize any given design.
Whether you’re creating monogrammed cookies to welcome a new baby or placing a monogram at the center of a wedding cake, a decorative monogram can represent people in many different ways.
Monograms have been a part of history since the Middle Ages. While they were originally a way for artists to claim their work, monograms eventually transitioned into purely decorative embellishments and a nice way to personalize any given design.
Whether you’re creating monogrammed cookies to welcome a new baby or placing a monogram at the center of a wedding cake, a decorative monogram can represent people in many different ways.
 When utilizing a monogram in a design, it is important to arrange the letters appropriately. For an individual, the monogram consists of the first initial of the first name, the first initial of the last name, and the first initial of the middle name. In the case of a couple, a monogram consists of the first initial of the person taking their partner’s last name, the first initial of their spouse’s last name, and the first initial of the spouse’s first name. I promise this sounds way more confusing than it actually is. Luckily, once the design has been formulated, it’s even easier to transfer the design to cakes or cookies.
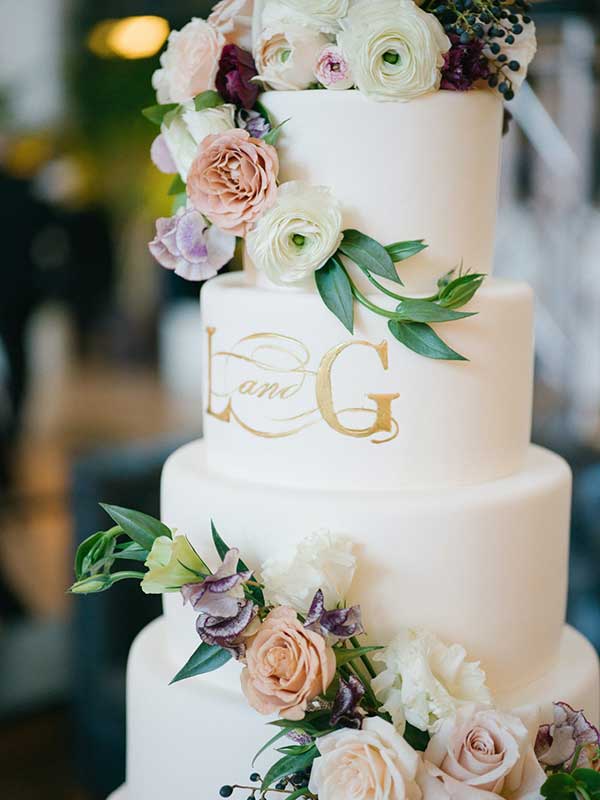
How to Transfer Your Monogram Design
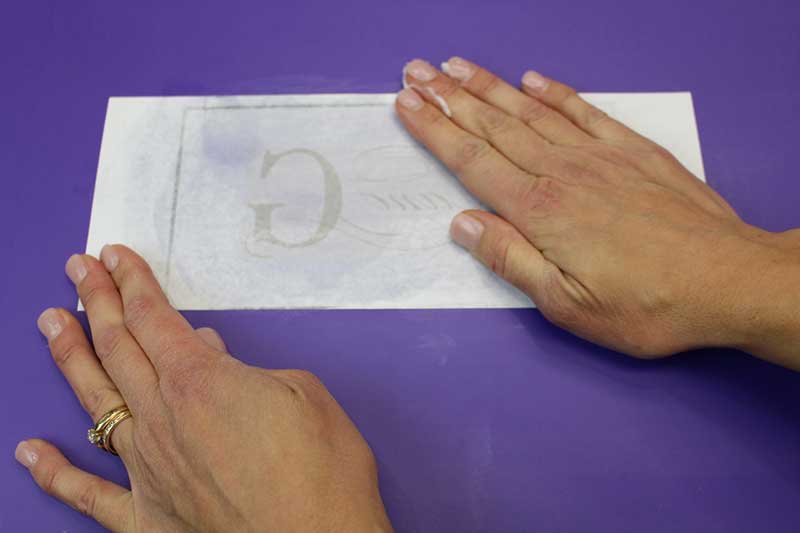
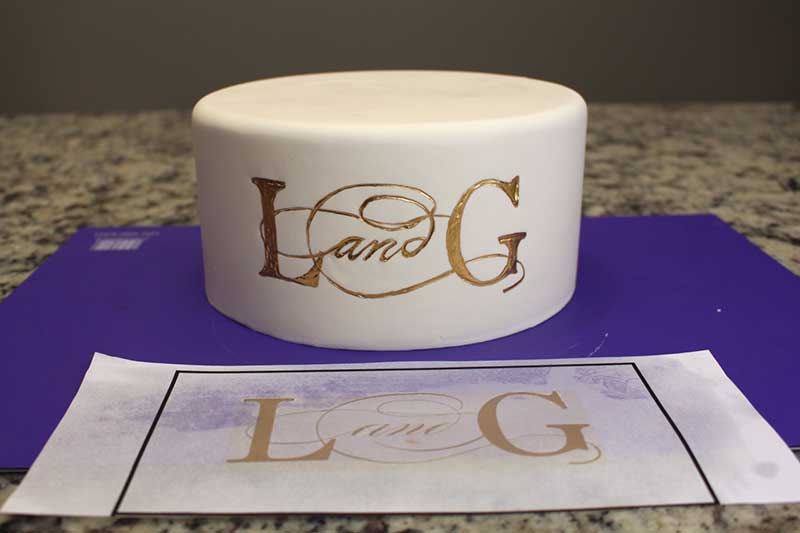
One of the easiest ways to transfer a design to buttercream or fondant is by tracing the pattern right onto the surface. However, don’t just place some paper on the surface and start tracing or you may end up having to recover the surface and start over. Follow these easy steps to create a flawless monogram every time. 1. Once the design has been made, scale the monogram to the desired size. A trick to scale it appropriately is to create a box that is the height and width of your cake or cookie, then place the design within the box to increase or decrease the size. Once the design is lined up, print it on thin, clean copy paper and trim the bottom edge to match the box. This ensures a perfect fit onto the surface of your cake.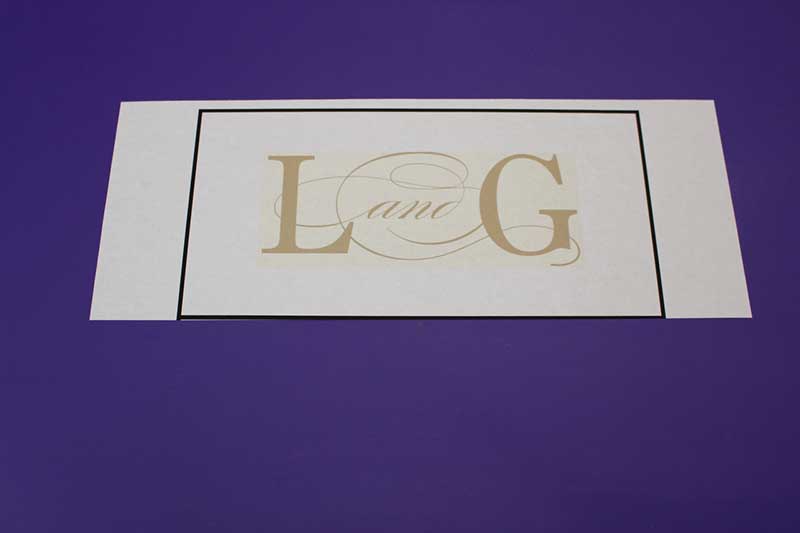 2. Lightly coat the back of the paper with shortening. This helps the to paper to stay in place while tracing but also allows it to peel off without disrupting the surface of your fondant or buttercream. (This technique is not recommended for use with meringue-based buttercream.)
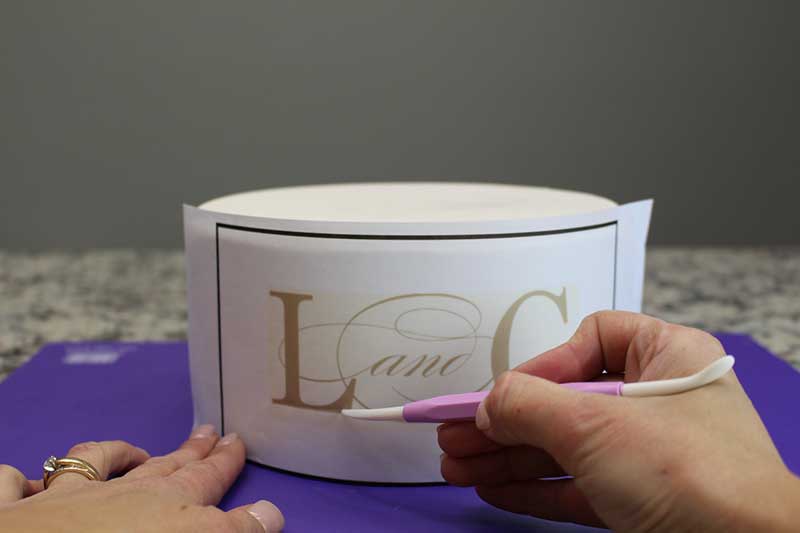
 3. Gently wrap the paper around the tier and smooth it out to remove any air bubbles. Make sure the paper is flush with the bottom edge to keep the monogram straight and centered.
4. Using light pressure, trace the monogram with a Dresden tool. Indent slightly, but do not push through the paper.
3. Gently wrap the paper around the tier and smooth it out to remove any air bubbles. Make sure the paper is flush with the bottom edge to keep the monogram straight and centered.
4. Using light pressure, trace the monogram with a Dresden tool. Indent slightly, but do not push through the paper.
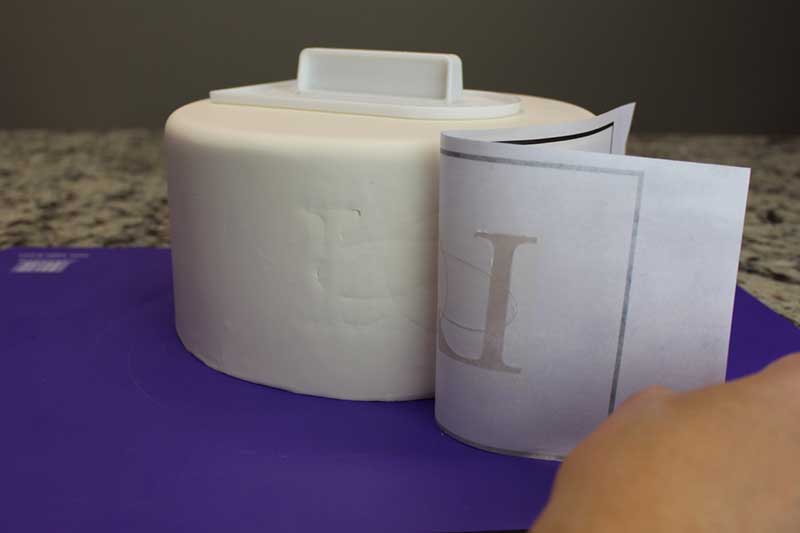
 5. As you progress through the design, peel back the paper slowly and check your lines. Smooth the paper back if you need to retrace any sections. I recommend working from left to right to avoid missing any lines. Once the tracing is complete, peel back the paper fully to remove.
 6. Keep the printed monogram at your workspace for reference as you paint just in case some of your lines are not very visible.
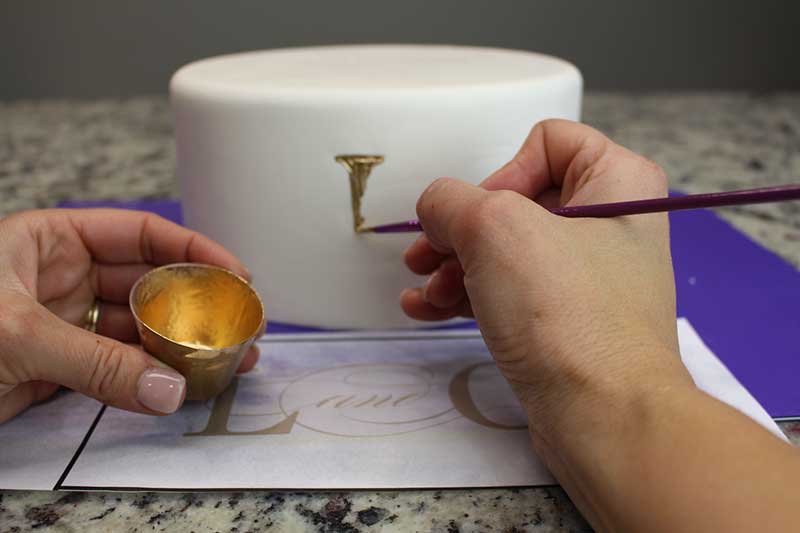 7. Painting can be executed using several different methods. This monogram was painted using a combination of luster dust and vegetable oil mixed at a toothpaste consistency. This method allows for full coverage and a streak-free finish with only one pass of the brush, but be careful not to touch the monogram as it does not fully dry. For a dry finish, use luster dust with a high-proof alcohol. This method may need a few coats of luster in order to achieve a more opaque look.
The key words are "looks easy." ;)
It is beautiful and looks easy. I will try. I'm still learning though. Thanks so much.
never new you cough use oil
Thank you, will have a go. You make it look easy. Look forward to hearing more.