 First, make sure you are using an airbrush-specific food paint. Using regular food dye such as a gel can potentially clog and damage your airbrush. Next, get a feel for your airbrush; some airbrushes allow you to control the pressure at which the air flows. It’s best to begin your airbrushing at a lower pressure and work your way to a higher pressure if needed. Starting too high can result in oversaturating your cookie with dye.
Before you begin to airbrush, your cookies need to have a completely dried base-layer of icing. Typically, a cookie needs a minimum of one to two hours to dry. You will know your cookie is dry if it no longer has a fresh, glossy sheen, and you can run your finger over the top of it without denting or smudging it.
 Lay your cookie on a protected surface, as airbrushing tends to be messy. If you plan to use your airbrush to accent the border of your cookie, it helps to use a turntable to spin your cookie without having to reach across your cookie. Holding your airbrush approximately six inches from your cookie, gently release the pressure on your airbrush gun and apply the airbrush paint. Again, work with a lower pressure setting and slowly build color to deepen it. Work in small sections, allow a few seconds of drying time, then recoat with airbrush paint.
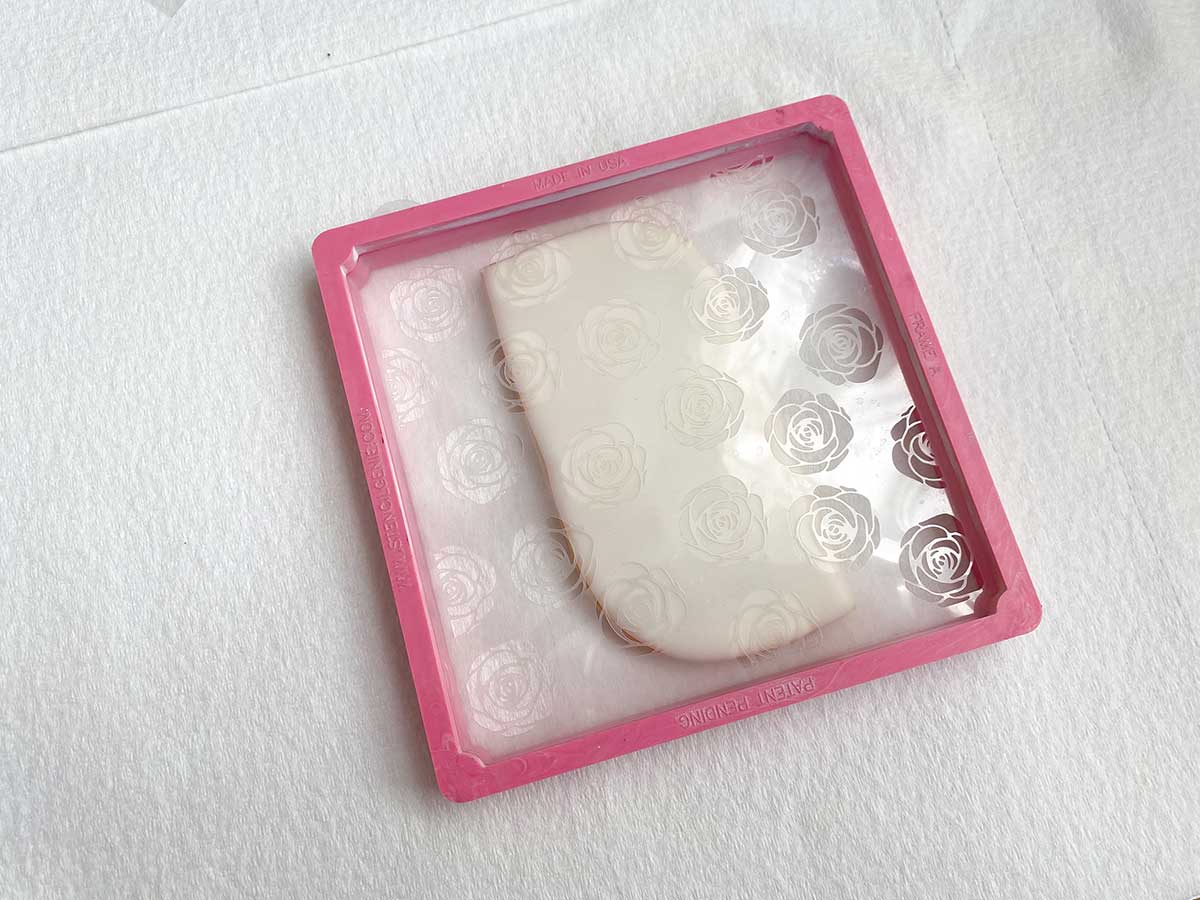
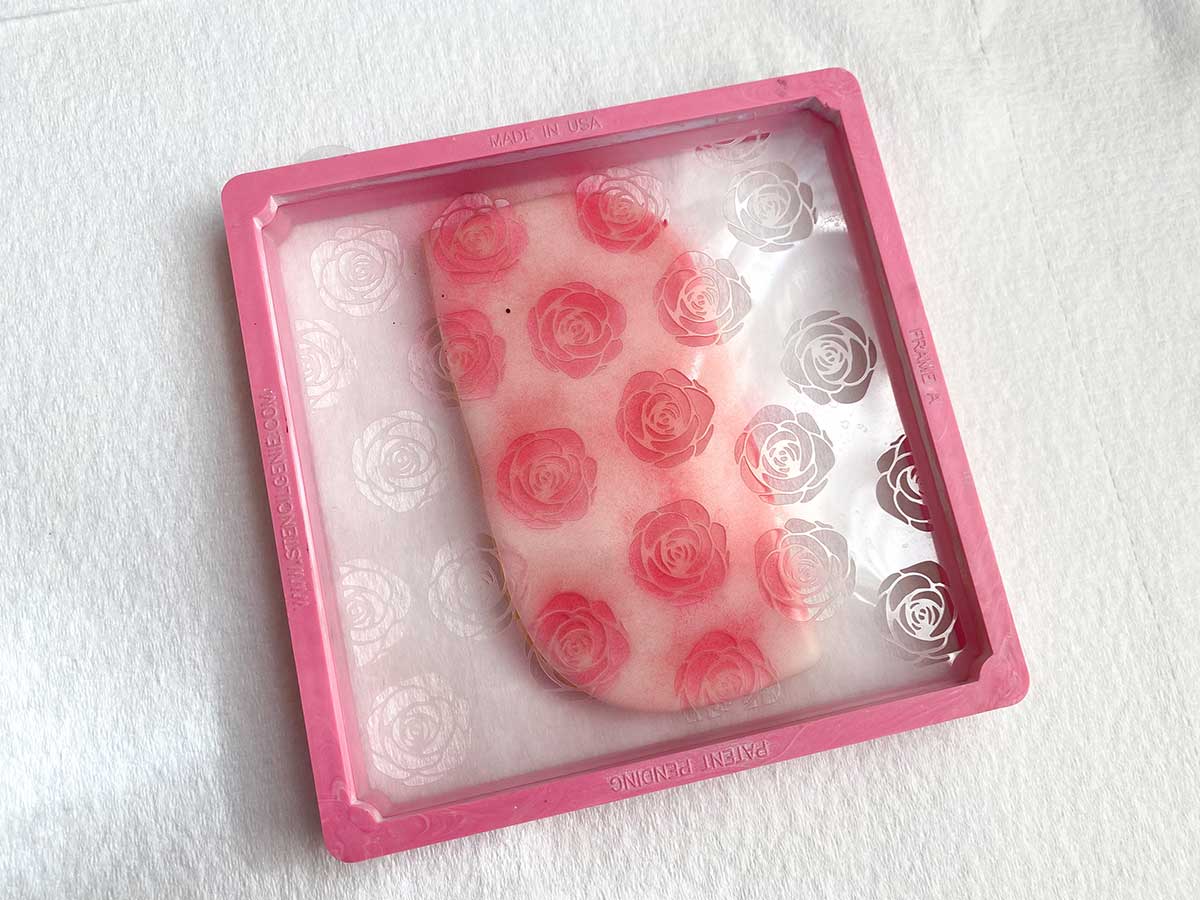
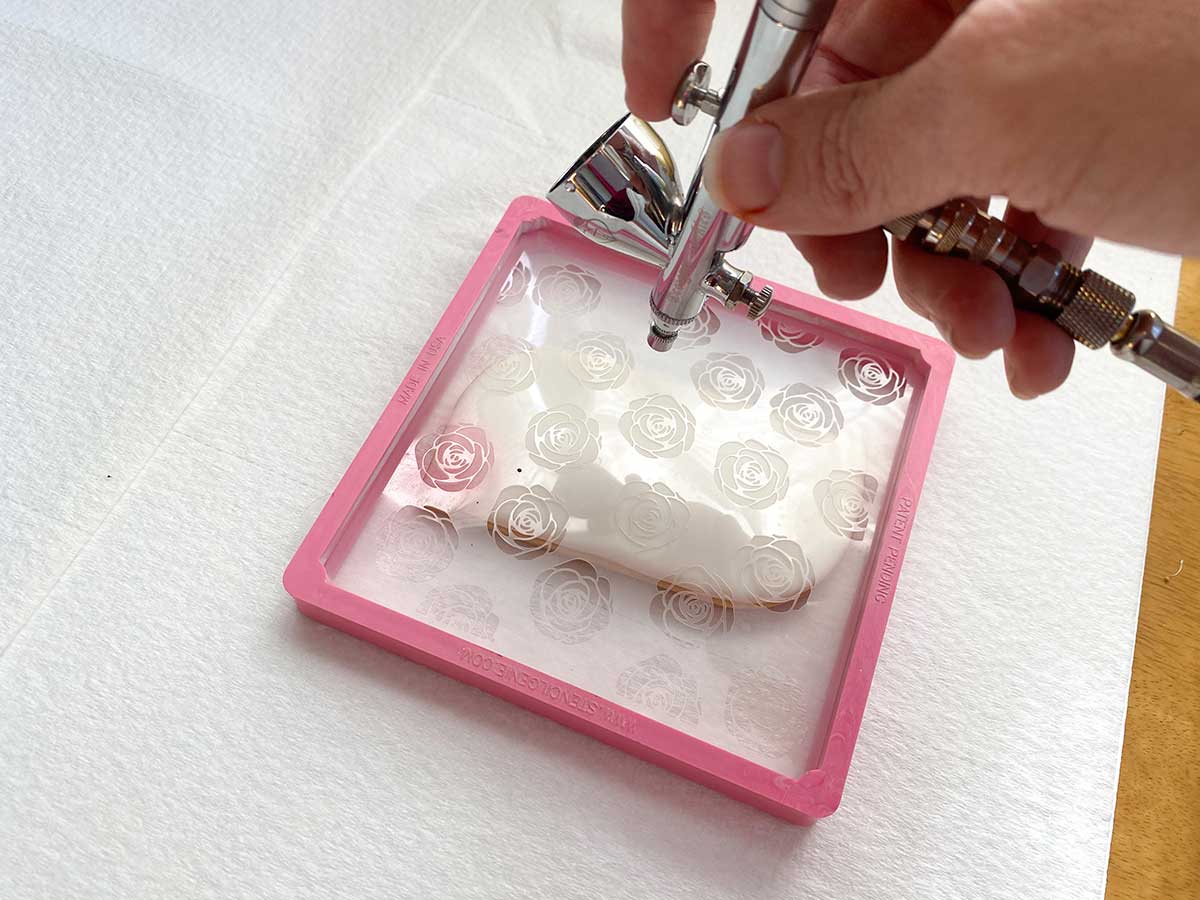 When using a stencil with your airbrush, we highly recommend using a stencil holder, which will keep the stencil taut and in place as you airbrush. Lay your stencil on top of your cookie, then position your airbrush gun at a 90-degree angle directly above your cookie. This helps avoid “under spray,” in which the paint can slip under the stencil and smudge the design. Again, work in light, even strokes across your cookie and slowly build the color, rather than applying high-pressure color all at once. When finished, gently remove your stencil by lifting it with two hands to ensure the stencil does not smudge the applied paint.
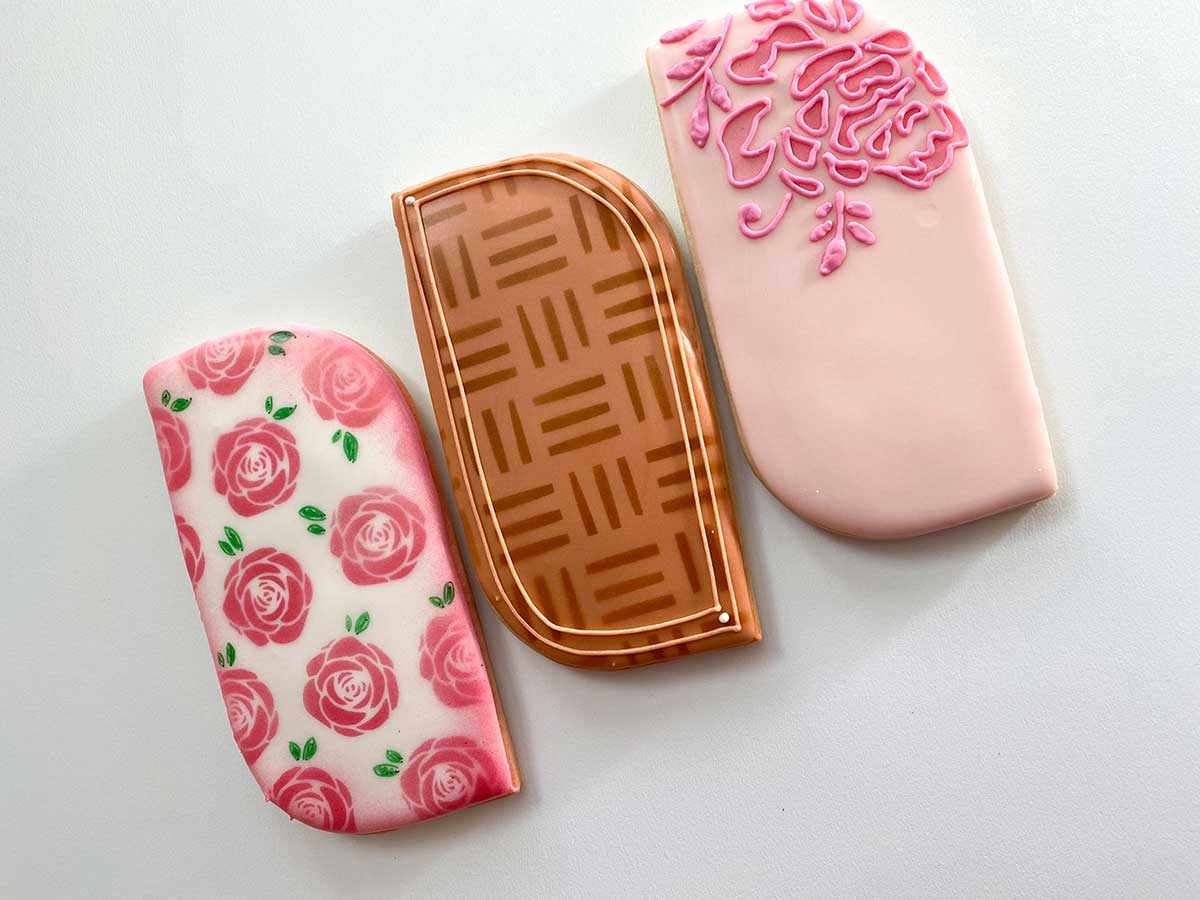
 Following these simple tricks when airbrushing your cookie will keep your final results looking crisp and professional. Now you’re ready to add some pattern, style, and depth to your cookies using your airbrush skills.
Please give me advice on how to stencil best on cookies and cakes. I’m finding it difficult how to address staging in stencils, such as going from cookie colors to adding greenery. How do I add the greenery without messing up the florals?
I am a beginner decorator trying to determine what I need/how to get started. Currently I just want to learn more to do fun things for family and friends. If I got comfortable enough I would consider selling on a very small scale.